Goal: authenticated inboxes ready for sending.
Prerequisites
- Access to your domain registrar
- Cloudflare account (free)
- Google Workspace admin access OR Microsoft 365 admin access
- Instantly Outreach Hypergrowth Plan
Buy lookalike domains
- Choose at least 2 domains that resemble your main brand.
- If your main domain is
acmeroofing.com, examples:acmeroof.com,acmeroofs.com.
Create email inboxes
- Google Workspace
- Microsoft 365
- Purchase 2–3 Google Workspace user licenses per domain at Google Workspace.
- Create 2–3 email addresses per domain (e.g.,
first@domainandfirst.last@domain).
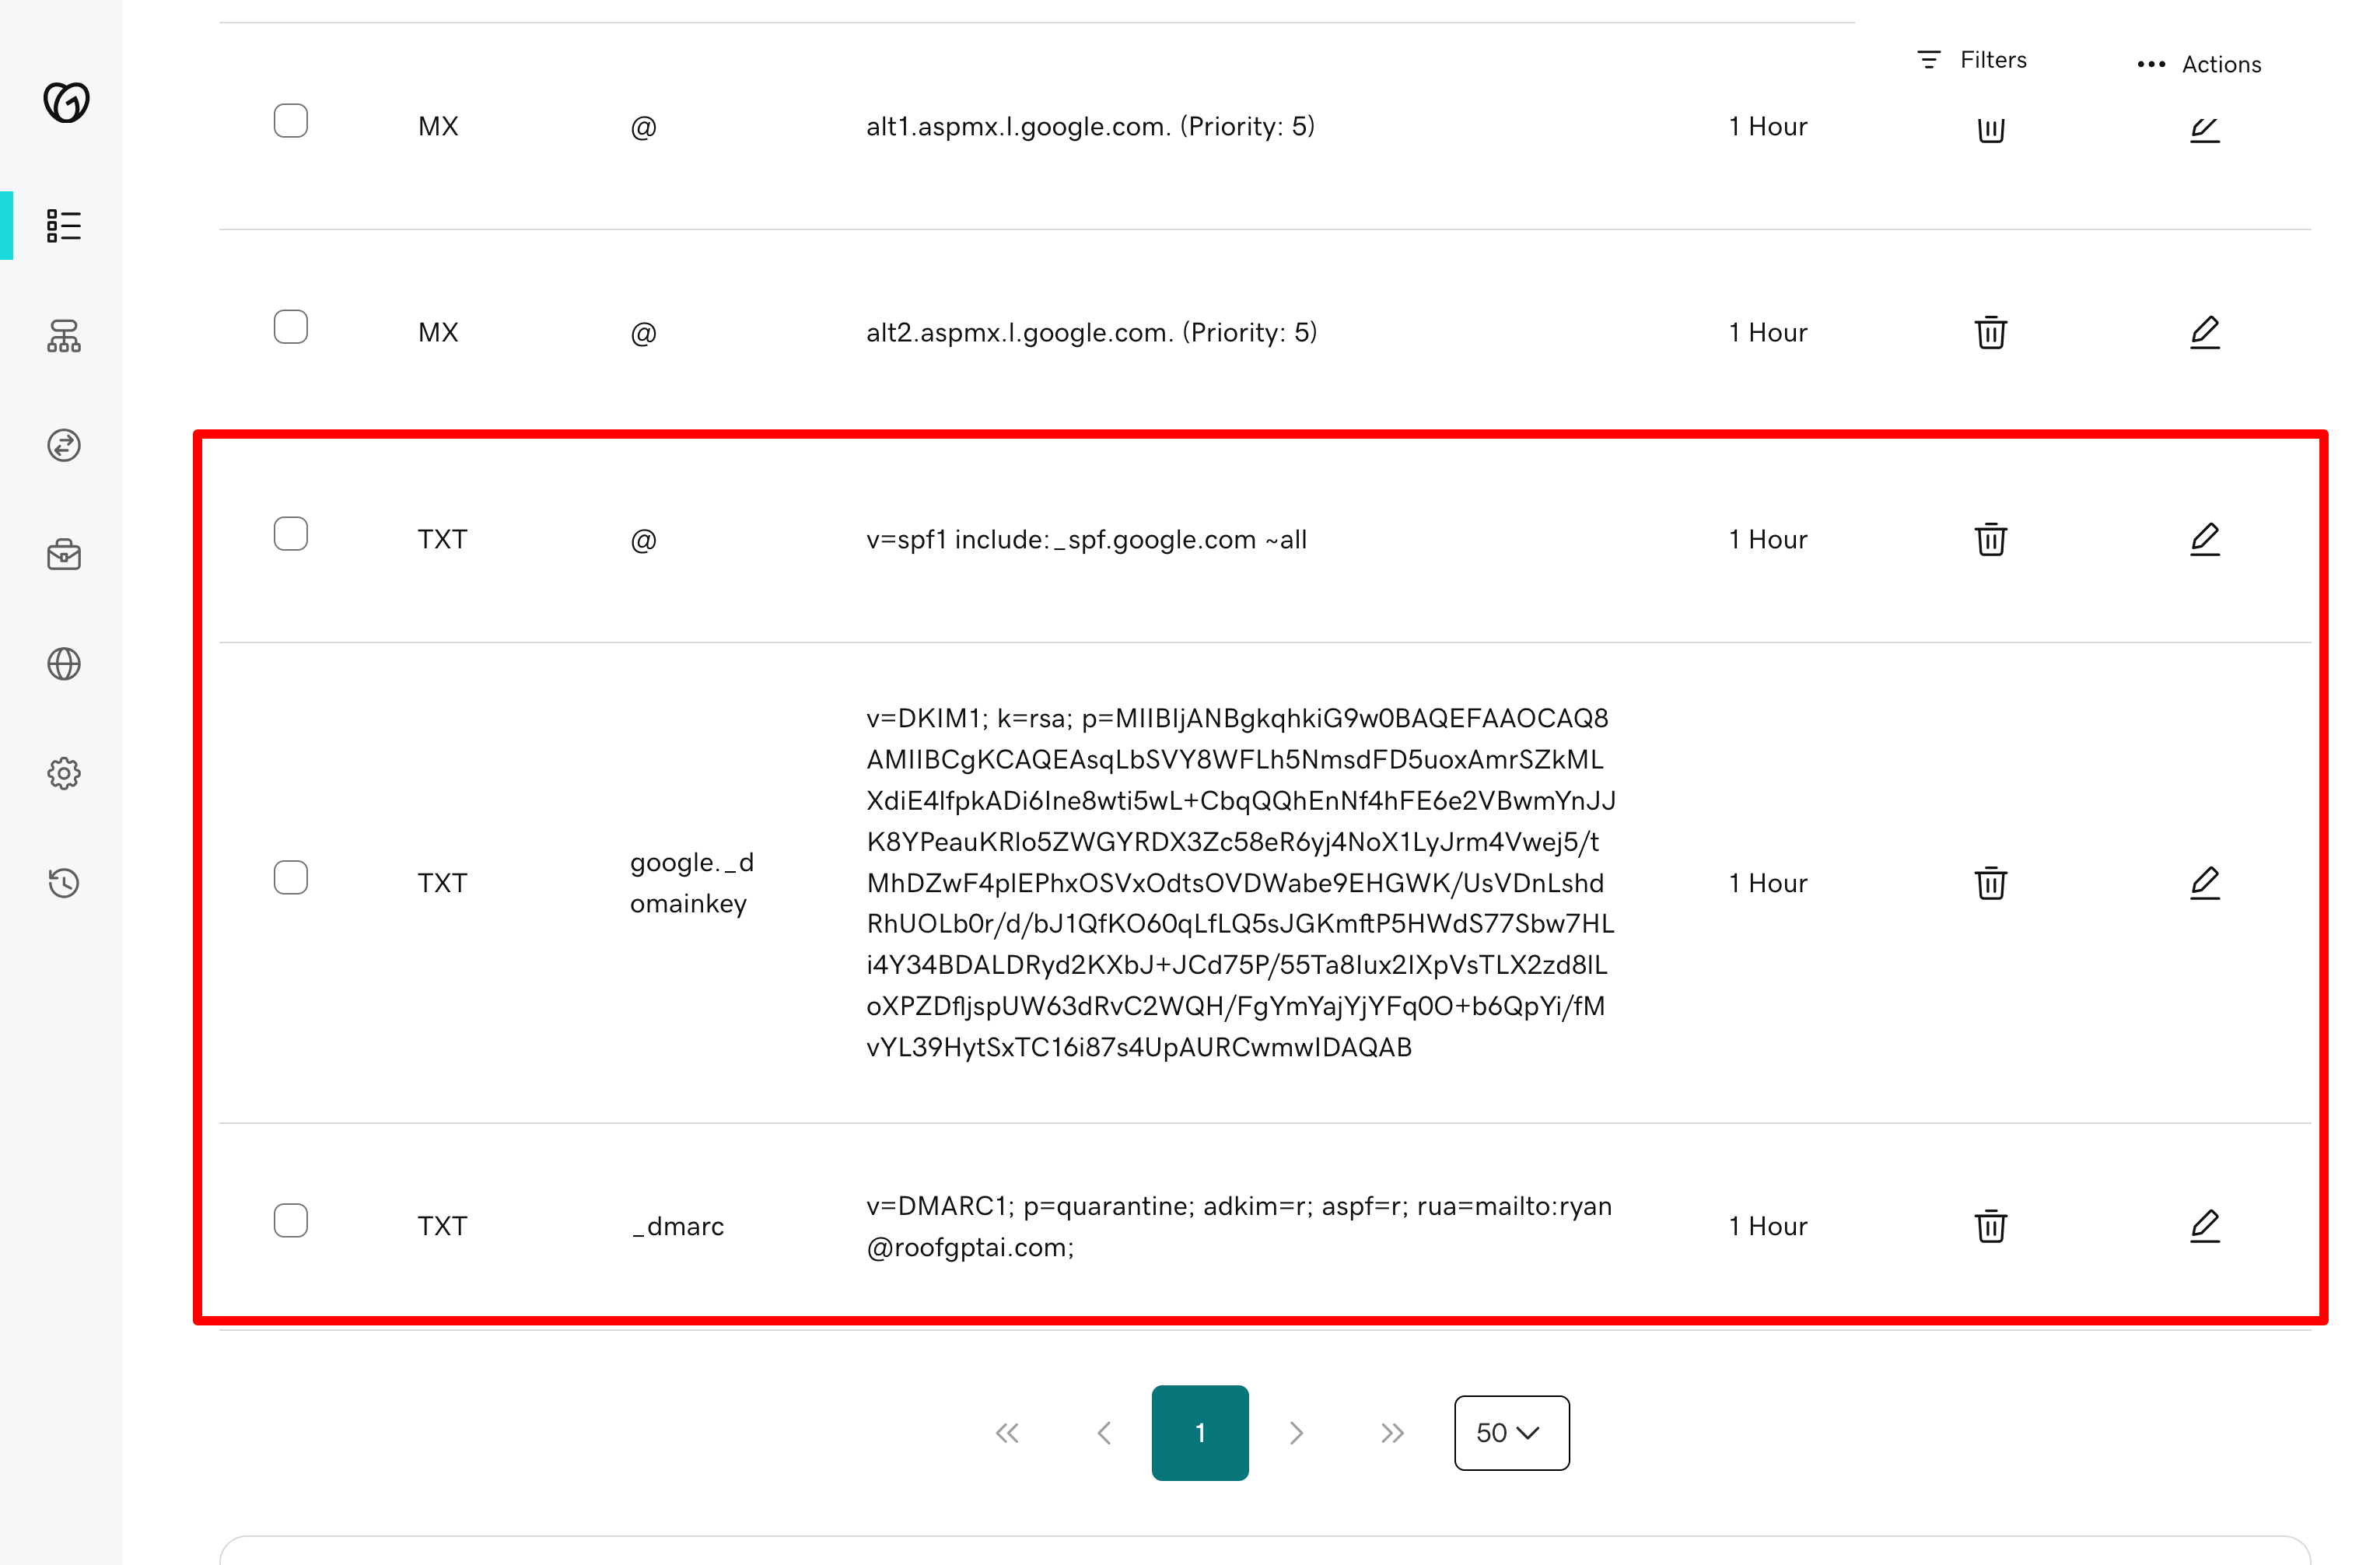
Add SPF, DKIM, DMARC records
- Add SPF TXT record:
- Google Workspace
- Microsoft 365
You can only have one SPF record per domain. If you already have an SPF record, merge the Google
include into your existing record.
- Add DMARC policy at
_dmarc:
Replace
your-email@domain.com with your actual email address where you want to receive DMARC
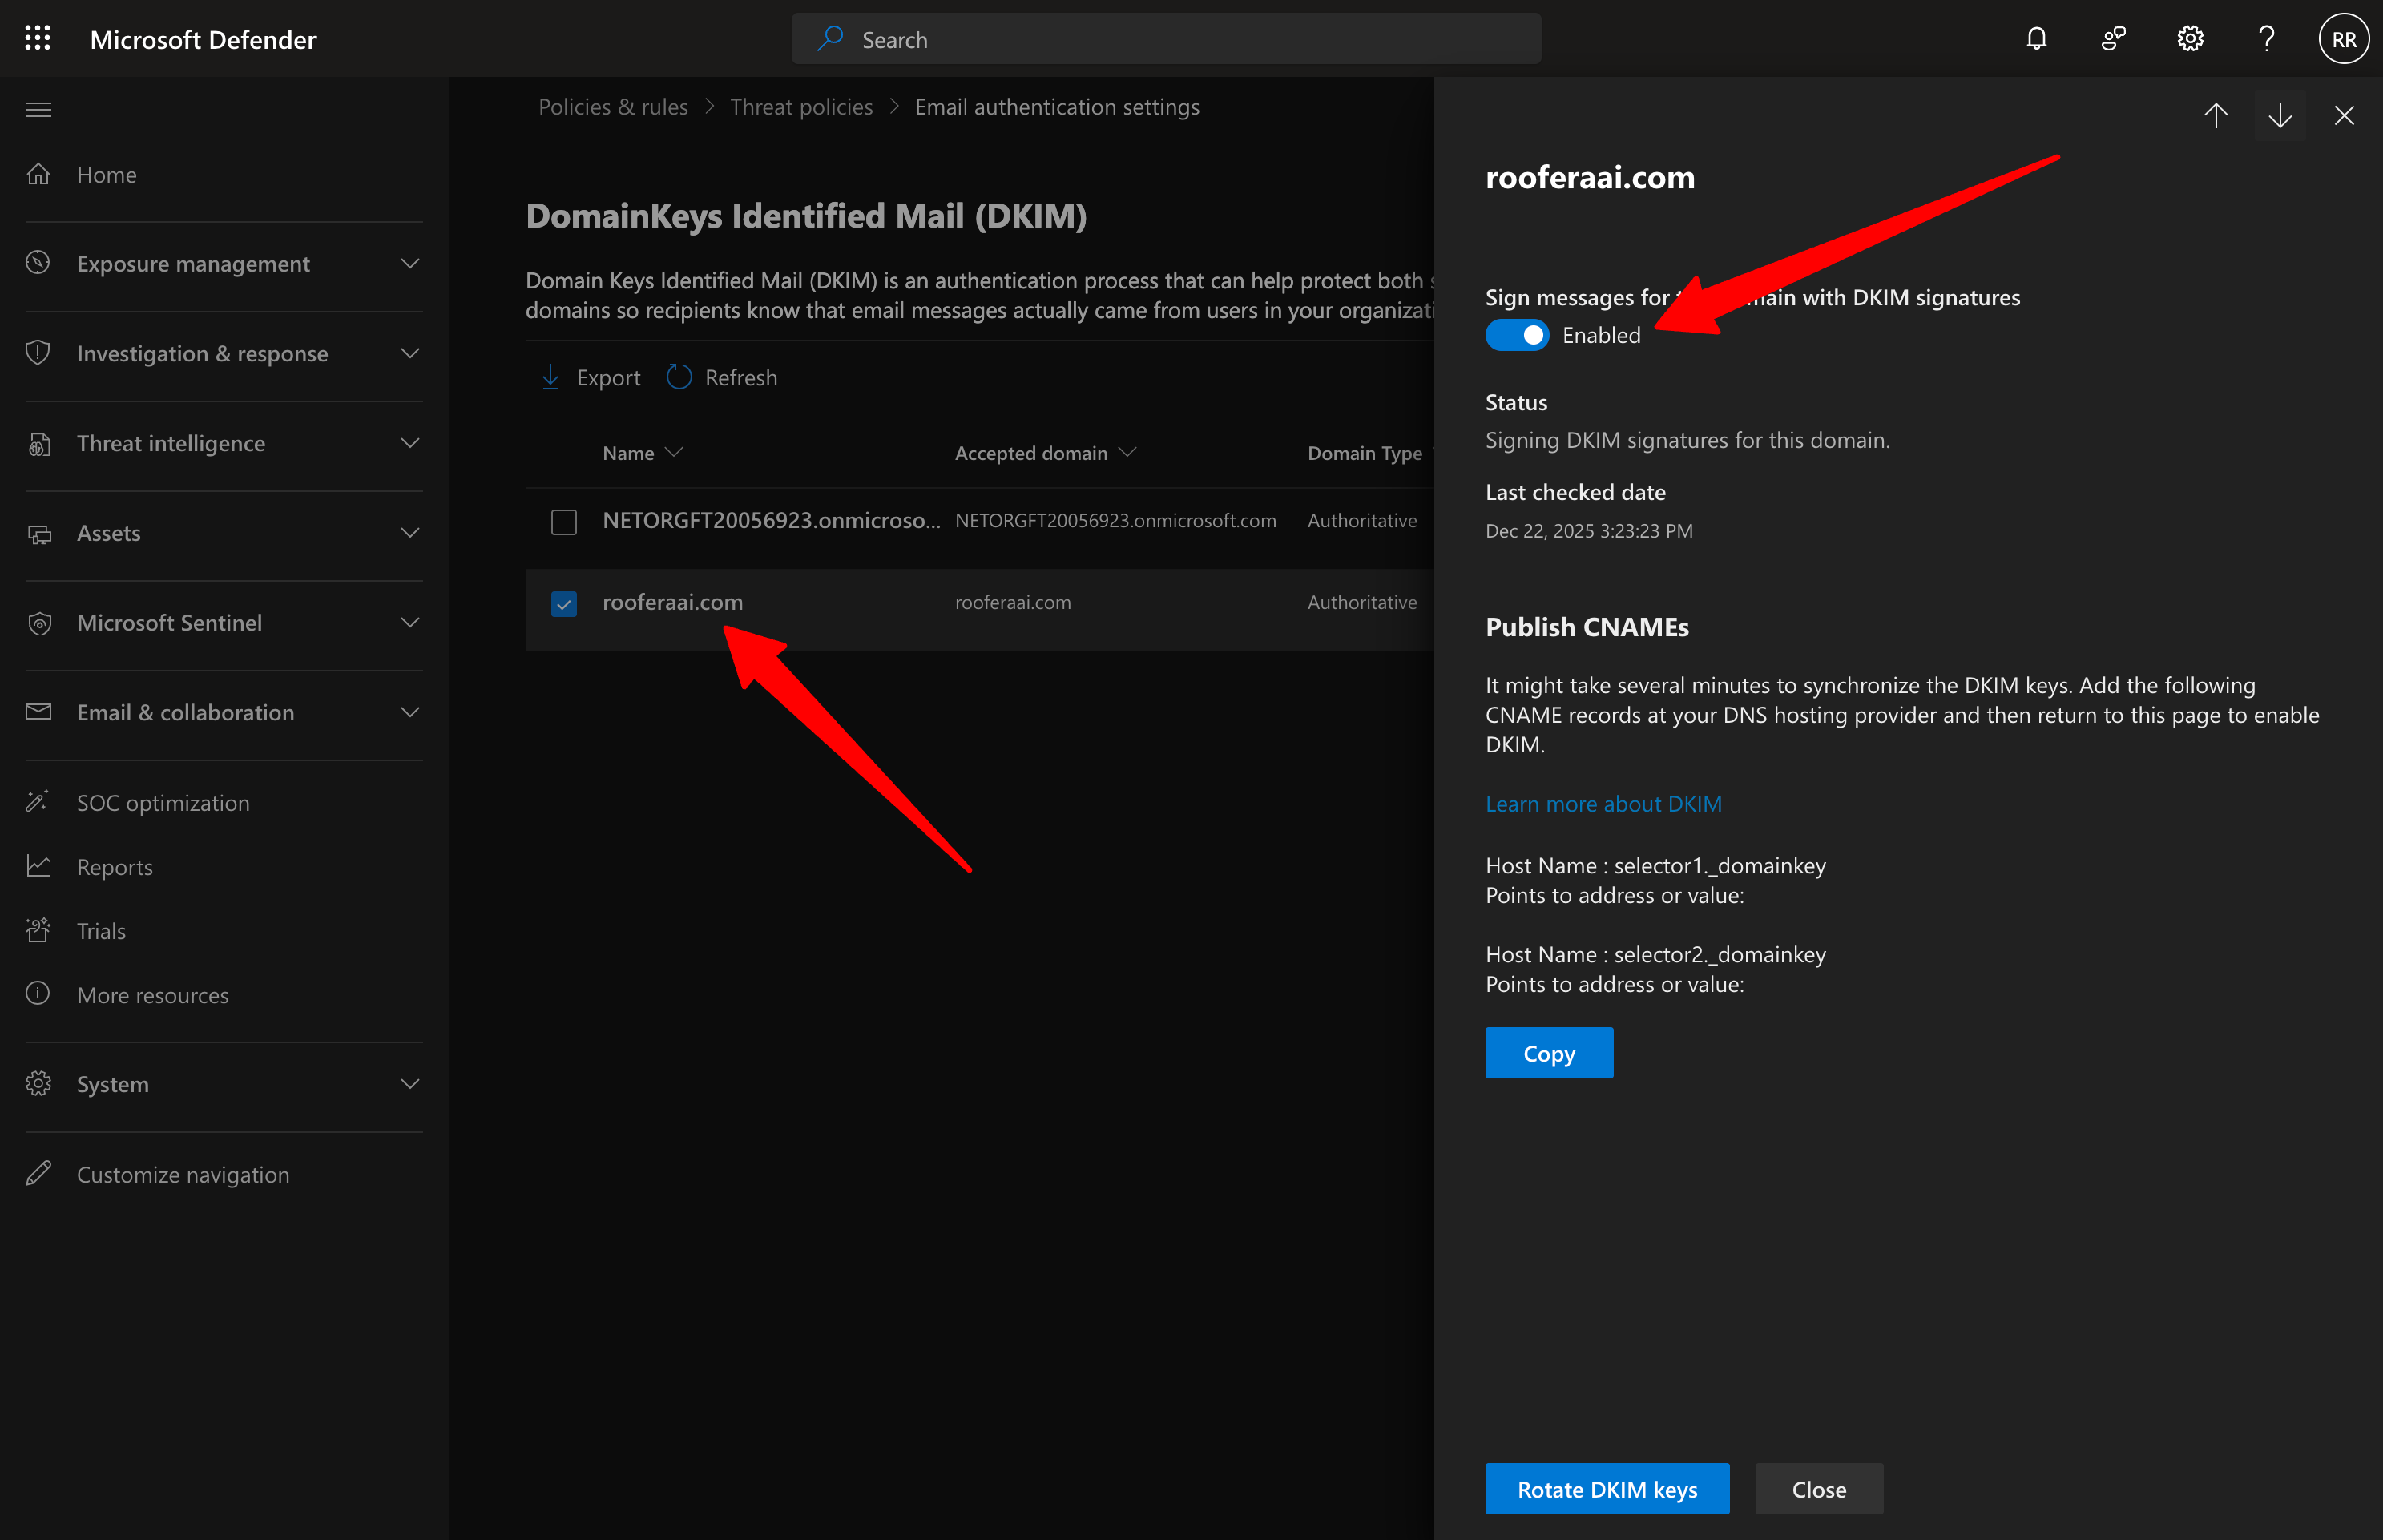
reports.- Generate and publish DKIM:
- Google Workspace
- Microsoft 365
- Visit Google Admin
- Go to Apps → Google Workspace → Gmail → Authenticate email
- Generate a new record. Set Select DKIM key bit length to
2048and Prefix selector (optional) togoogle - Add the new DNS record at your registrar/DNS host
- Click Start authenticating in Google Admin
Enable domain forwarding (Cloudflare)
- Create a free Cloudflare account if you do not already have one.
- Add your lookalike domain to Cloudflare.
- Move the existing domain: when prompted, update your registrar’s nameservers to the two Cloudflare nameservers provided.
- After updating nameservers, wait a few minutes for propagation.
When moving to Cloudflare, set all email-related DNS records to DNS only: MX, SPF TXT,
DKIM records (TXT for Google:
google._domainkey, or CNAME for Microsoft:
selector1._domainkey and selector2._domainkey), and DMARC TXT (_dmarc). Set website
records (root A/CNAME, www) to Proxied.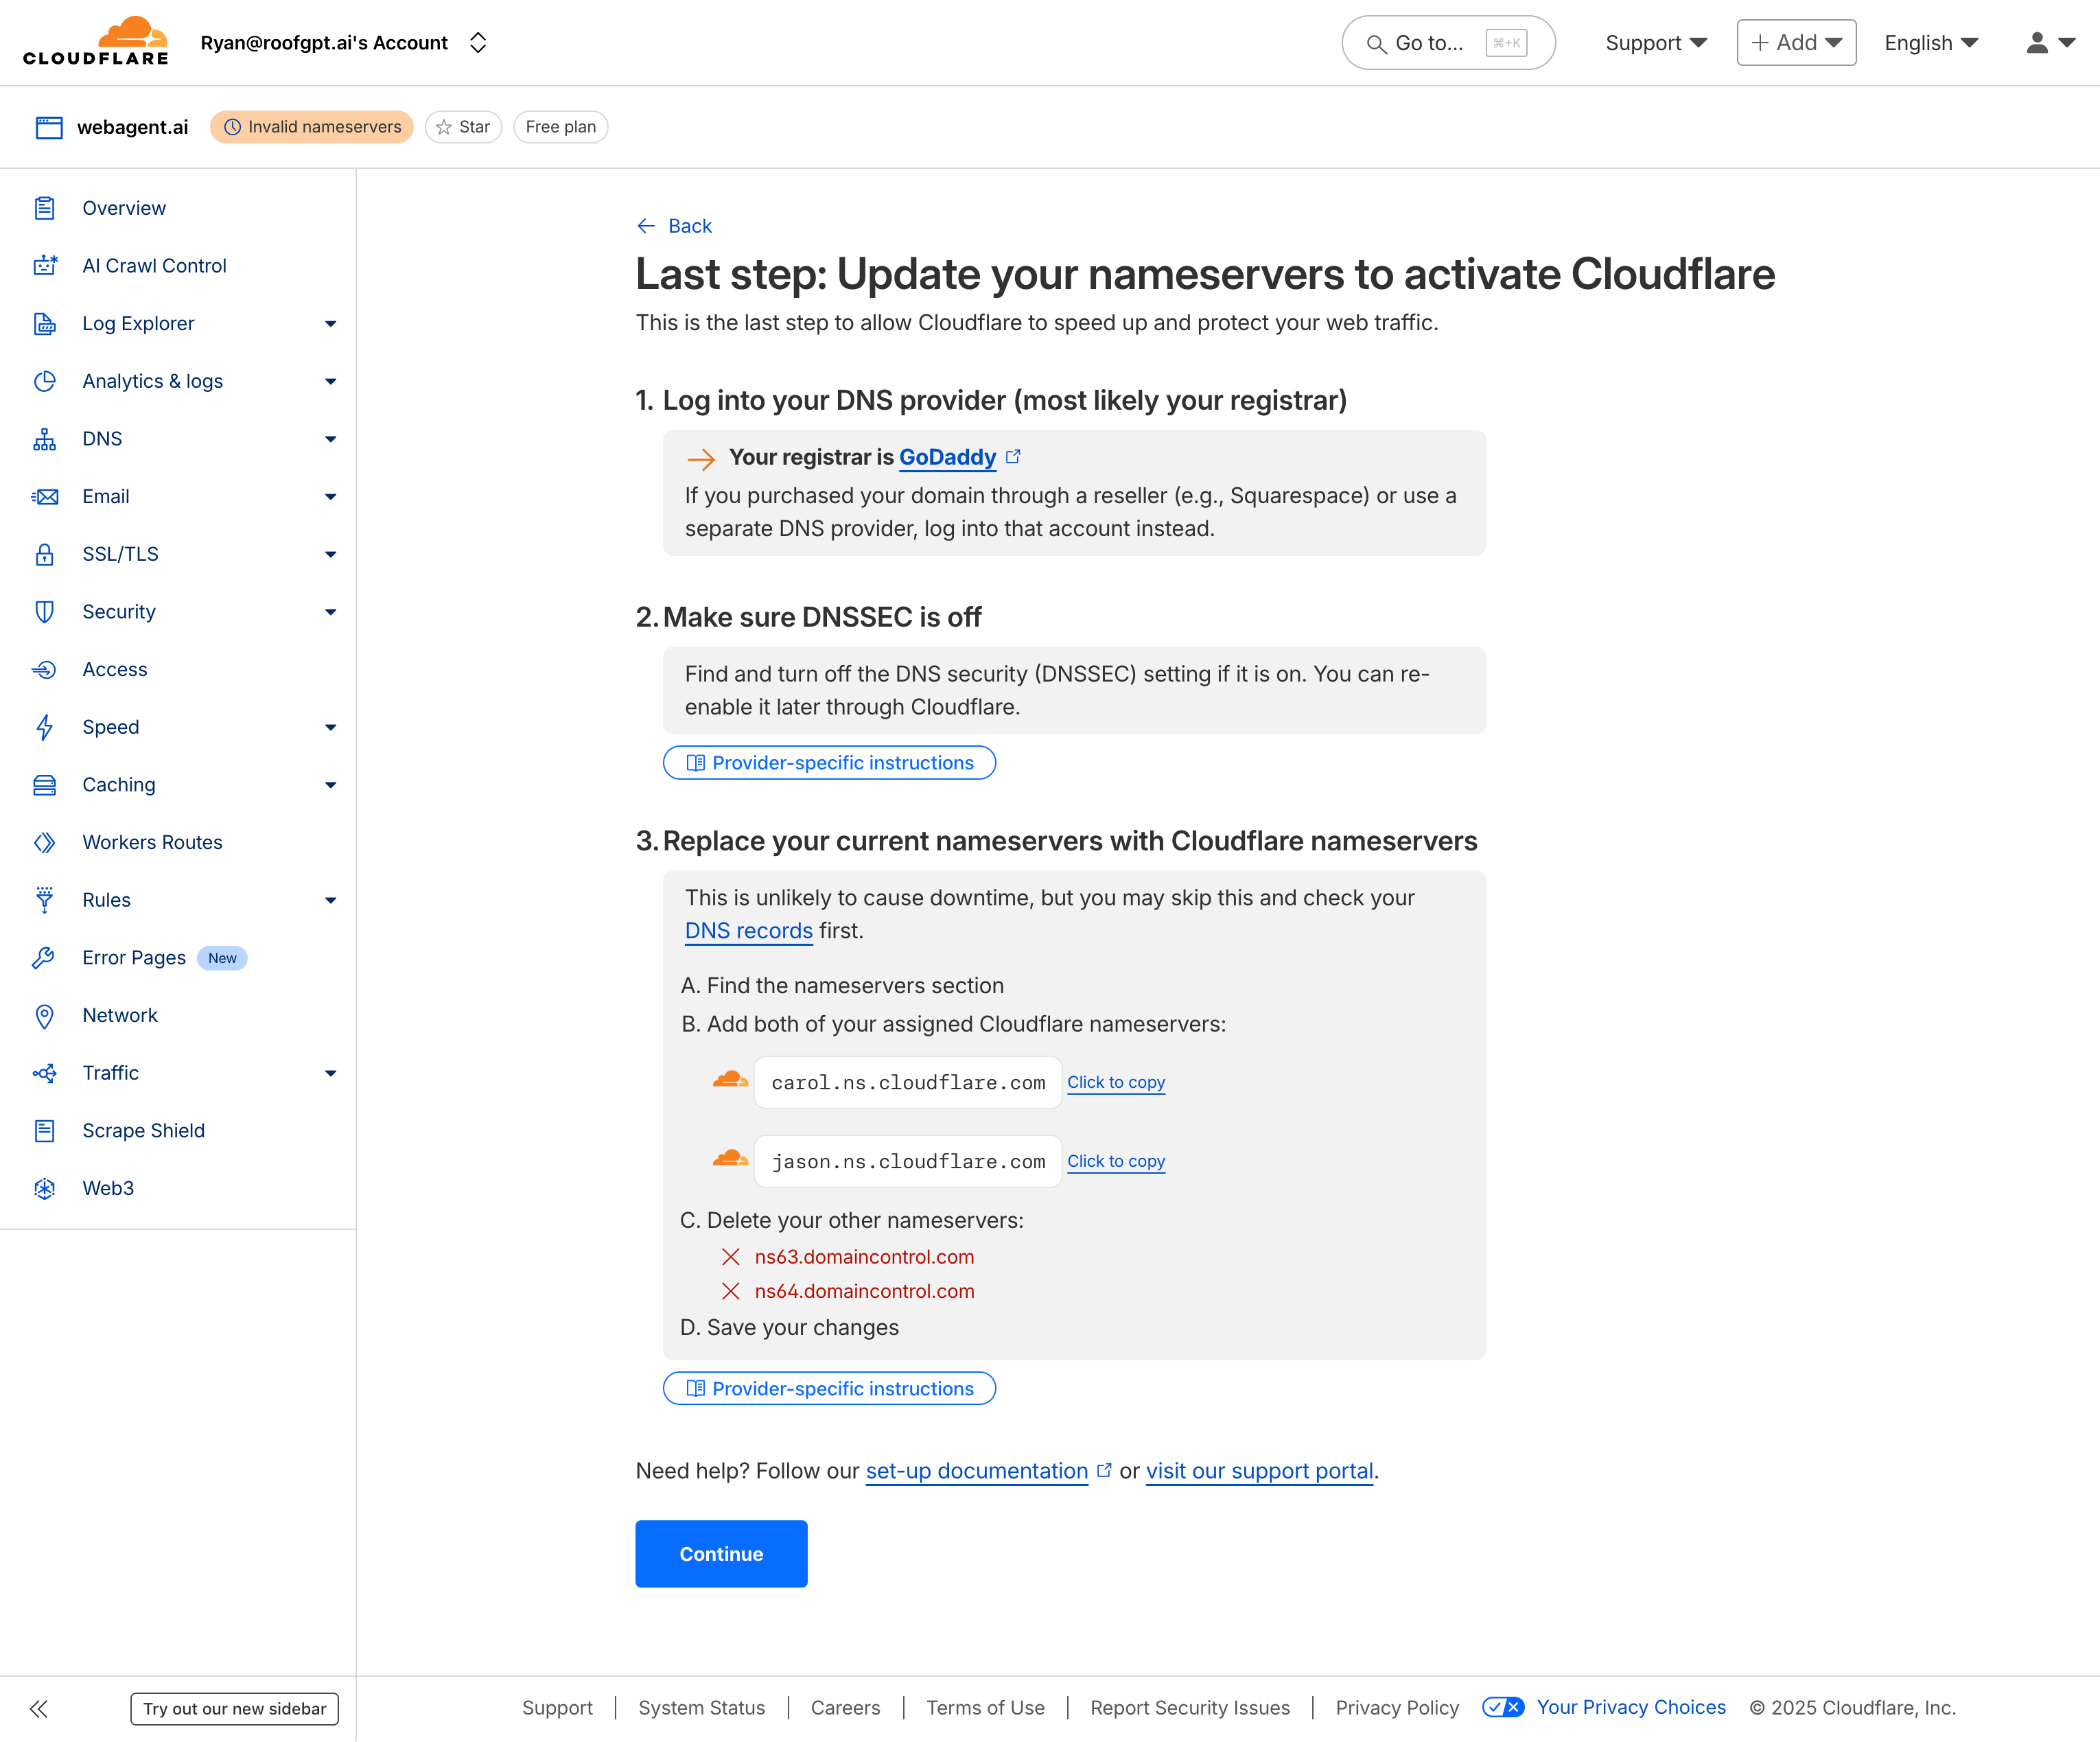
-
Using Cloudflare Page Rules instead of registrar DNS forwarding prevents email service providers from detecting and flagging your domain for cold outreach. Registrar forwarding is easily identified; Cloudflare forwarding is not.
-
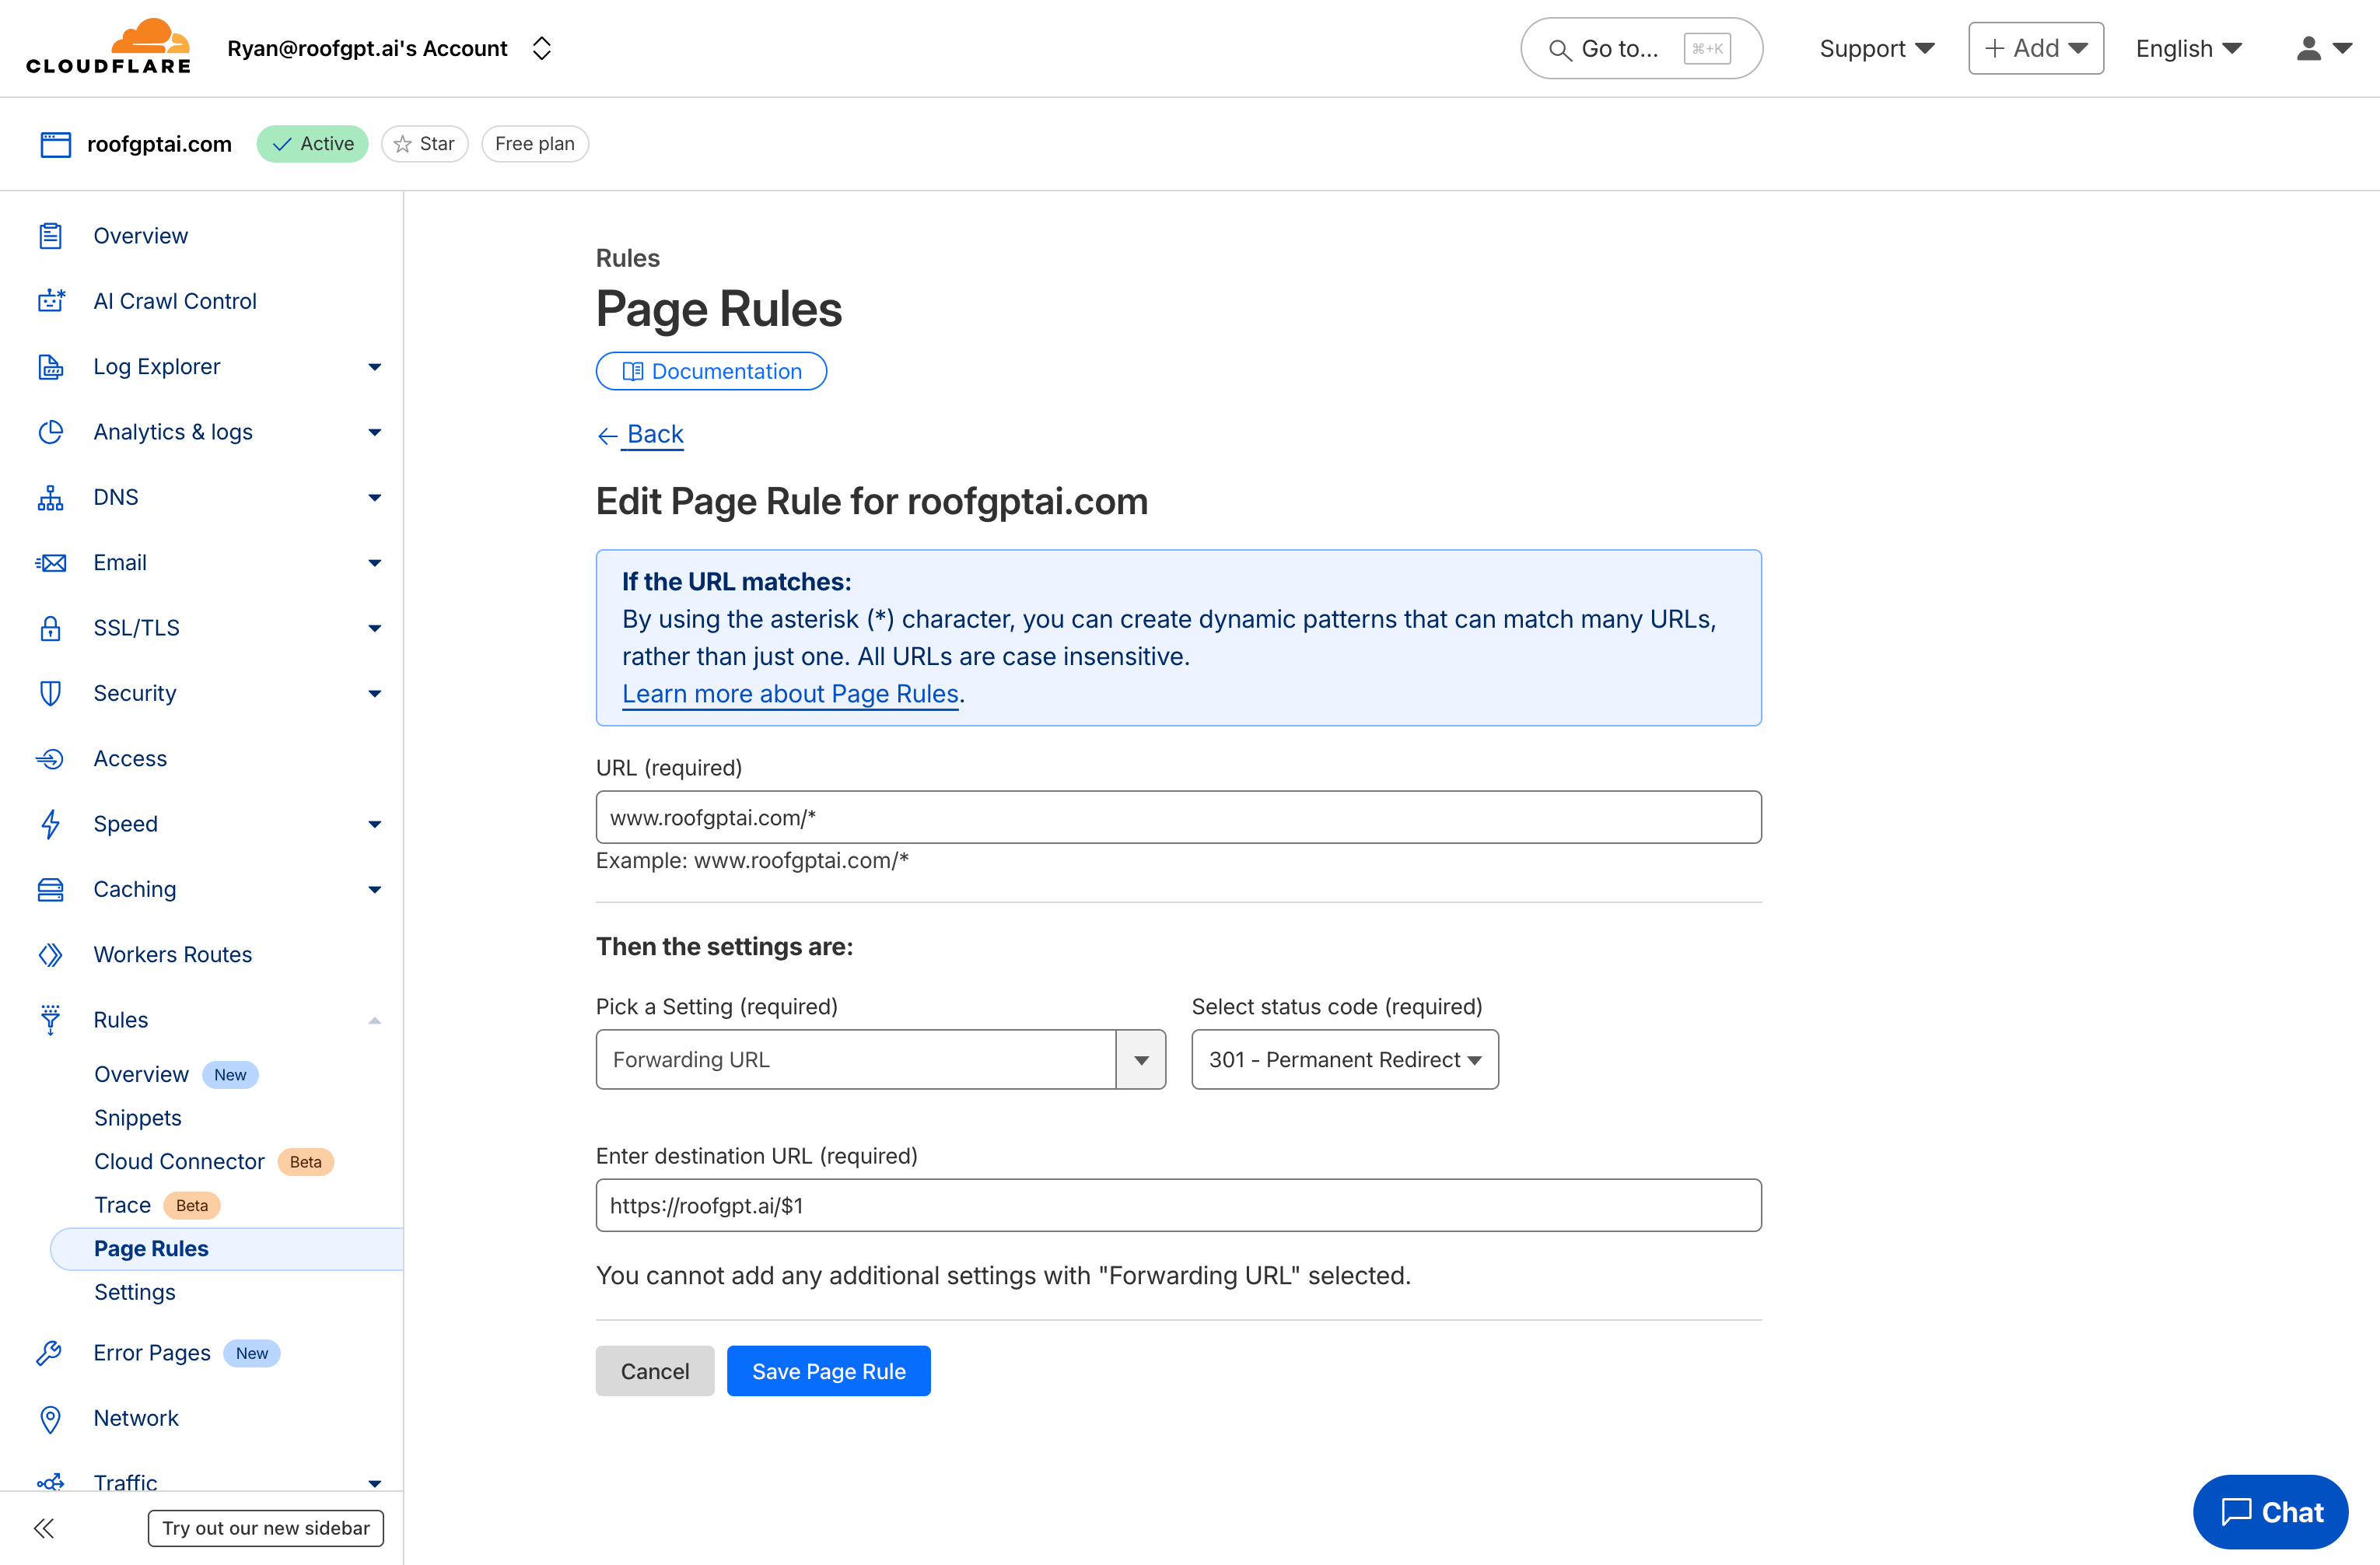
Once the domain shows as Active in Cloudflare, create a Page Rule to forward the lookalike to your primary domain:
- Open your domain in Cloudflare → Rules → Page Rules → Create Page Rule.
- If URL matches:
https://your-lookalike.com/*(the*matches any path). - Setting:
Forwarding URLwith status code301 - Permanent Redirect. - Destination URL:
https://your-primary.com/$1(the$1preserves the path after the domain). - Save and deploy, then test by visiting the lookalike domain.