> ## Documentation Index
> Fetch the complete documentation index at: https://docs.leads.roofera.ai/llms.txt
> Use this file to discover all available pages before exploring further.
# Step 3 — Leads & Airtable
> Add Reonomy URLs, scrape properties, validate emails, and upload to campaigns.
This workflow connects Reonomy property data → validated contacts → Instantly campaigns
automatically.
## Prerequisites
* Airtable base access
* Reonomy account with target area selected
- Navigate to the **Lead Sources** table in your Airtable base.
- Click **Create new\...** to add a row.
- In Reonomy, set your filters (target area, building type, property criteria).
- Copy the Reonomy search URL from your browser.
- Paste the URL into the **Target URL** field in the new Lead Sources row.
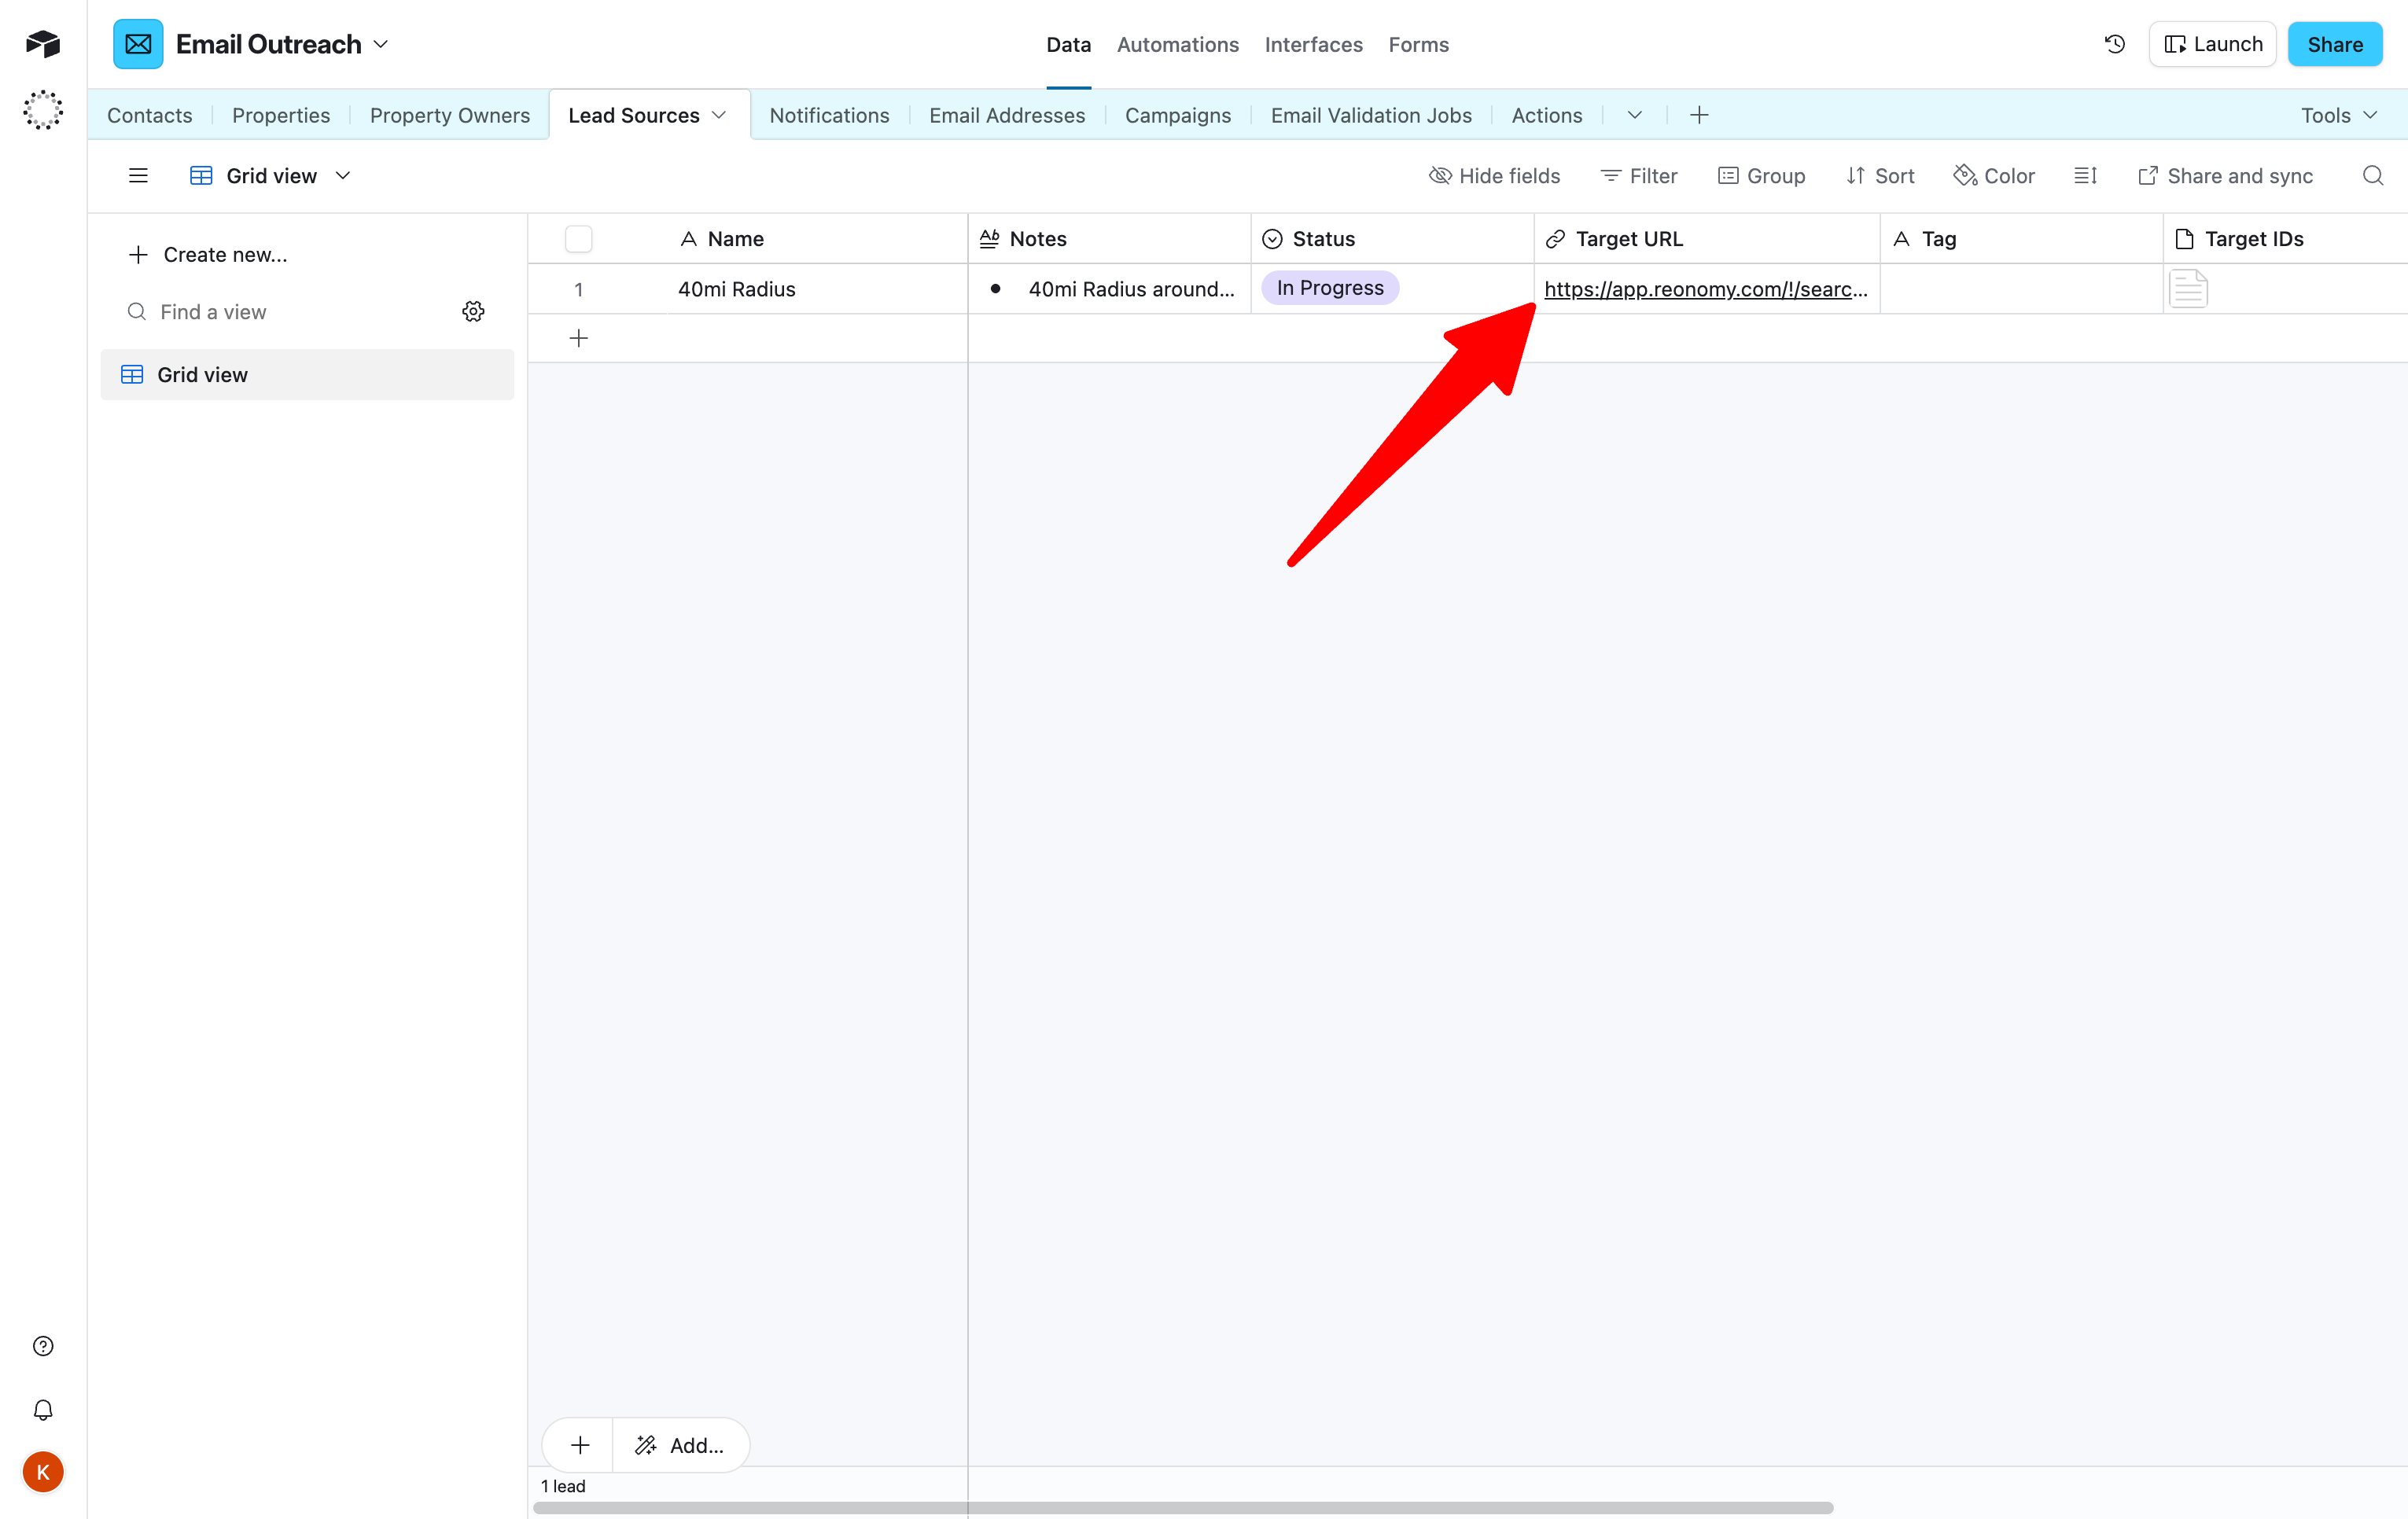 Target URL is saved in the Lead Sources table.
Once your Reonomy URL is added, the backend system will:
* Scrape all properties from your Reonomy link
* Populate the **Contacts**, **Properties**, and **Property Owners** tables
* Automatically validate email addresses using NeverBounce
* Update contact Status to **Validated Emails** for valid addresses
Target URL is saved in the Lead Sources table.
Once your Reonomy URL is added, the backend system will:
* Scrape all properties from your Reonomy link
* Populate the **Contacts**, **Properties**, and **Property Owners** tables
* Automatically validate email addresses using NeverBounce
* Update contact Status to **Validated Emails** for valid addresses
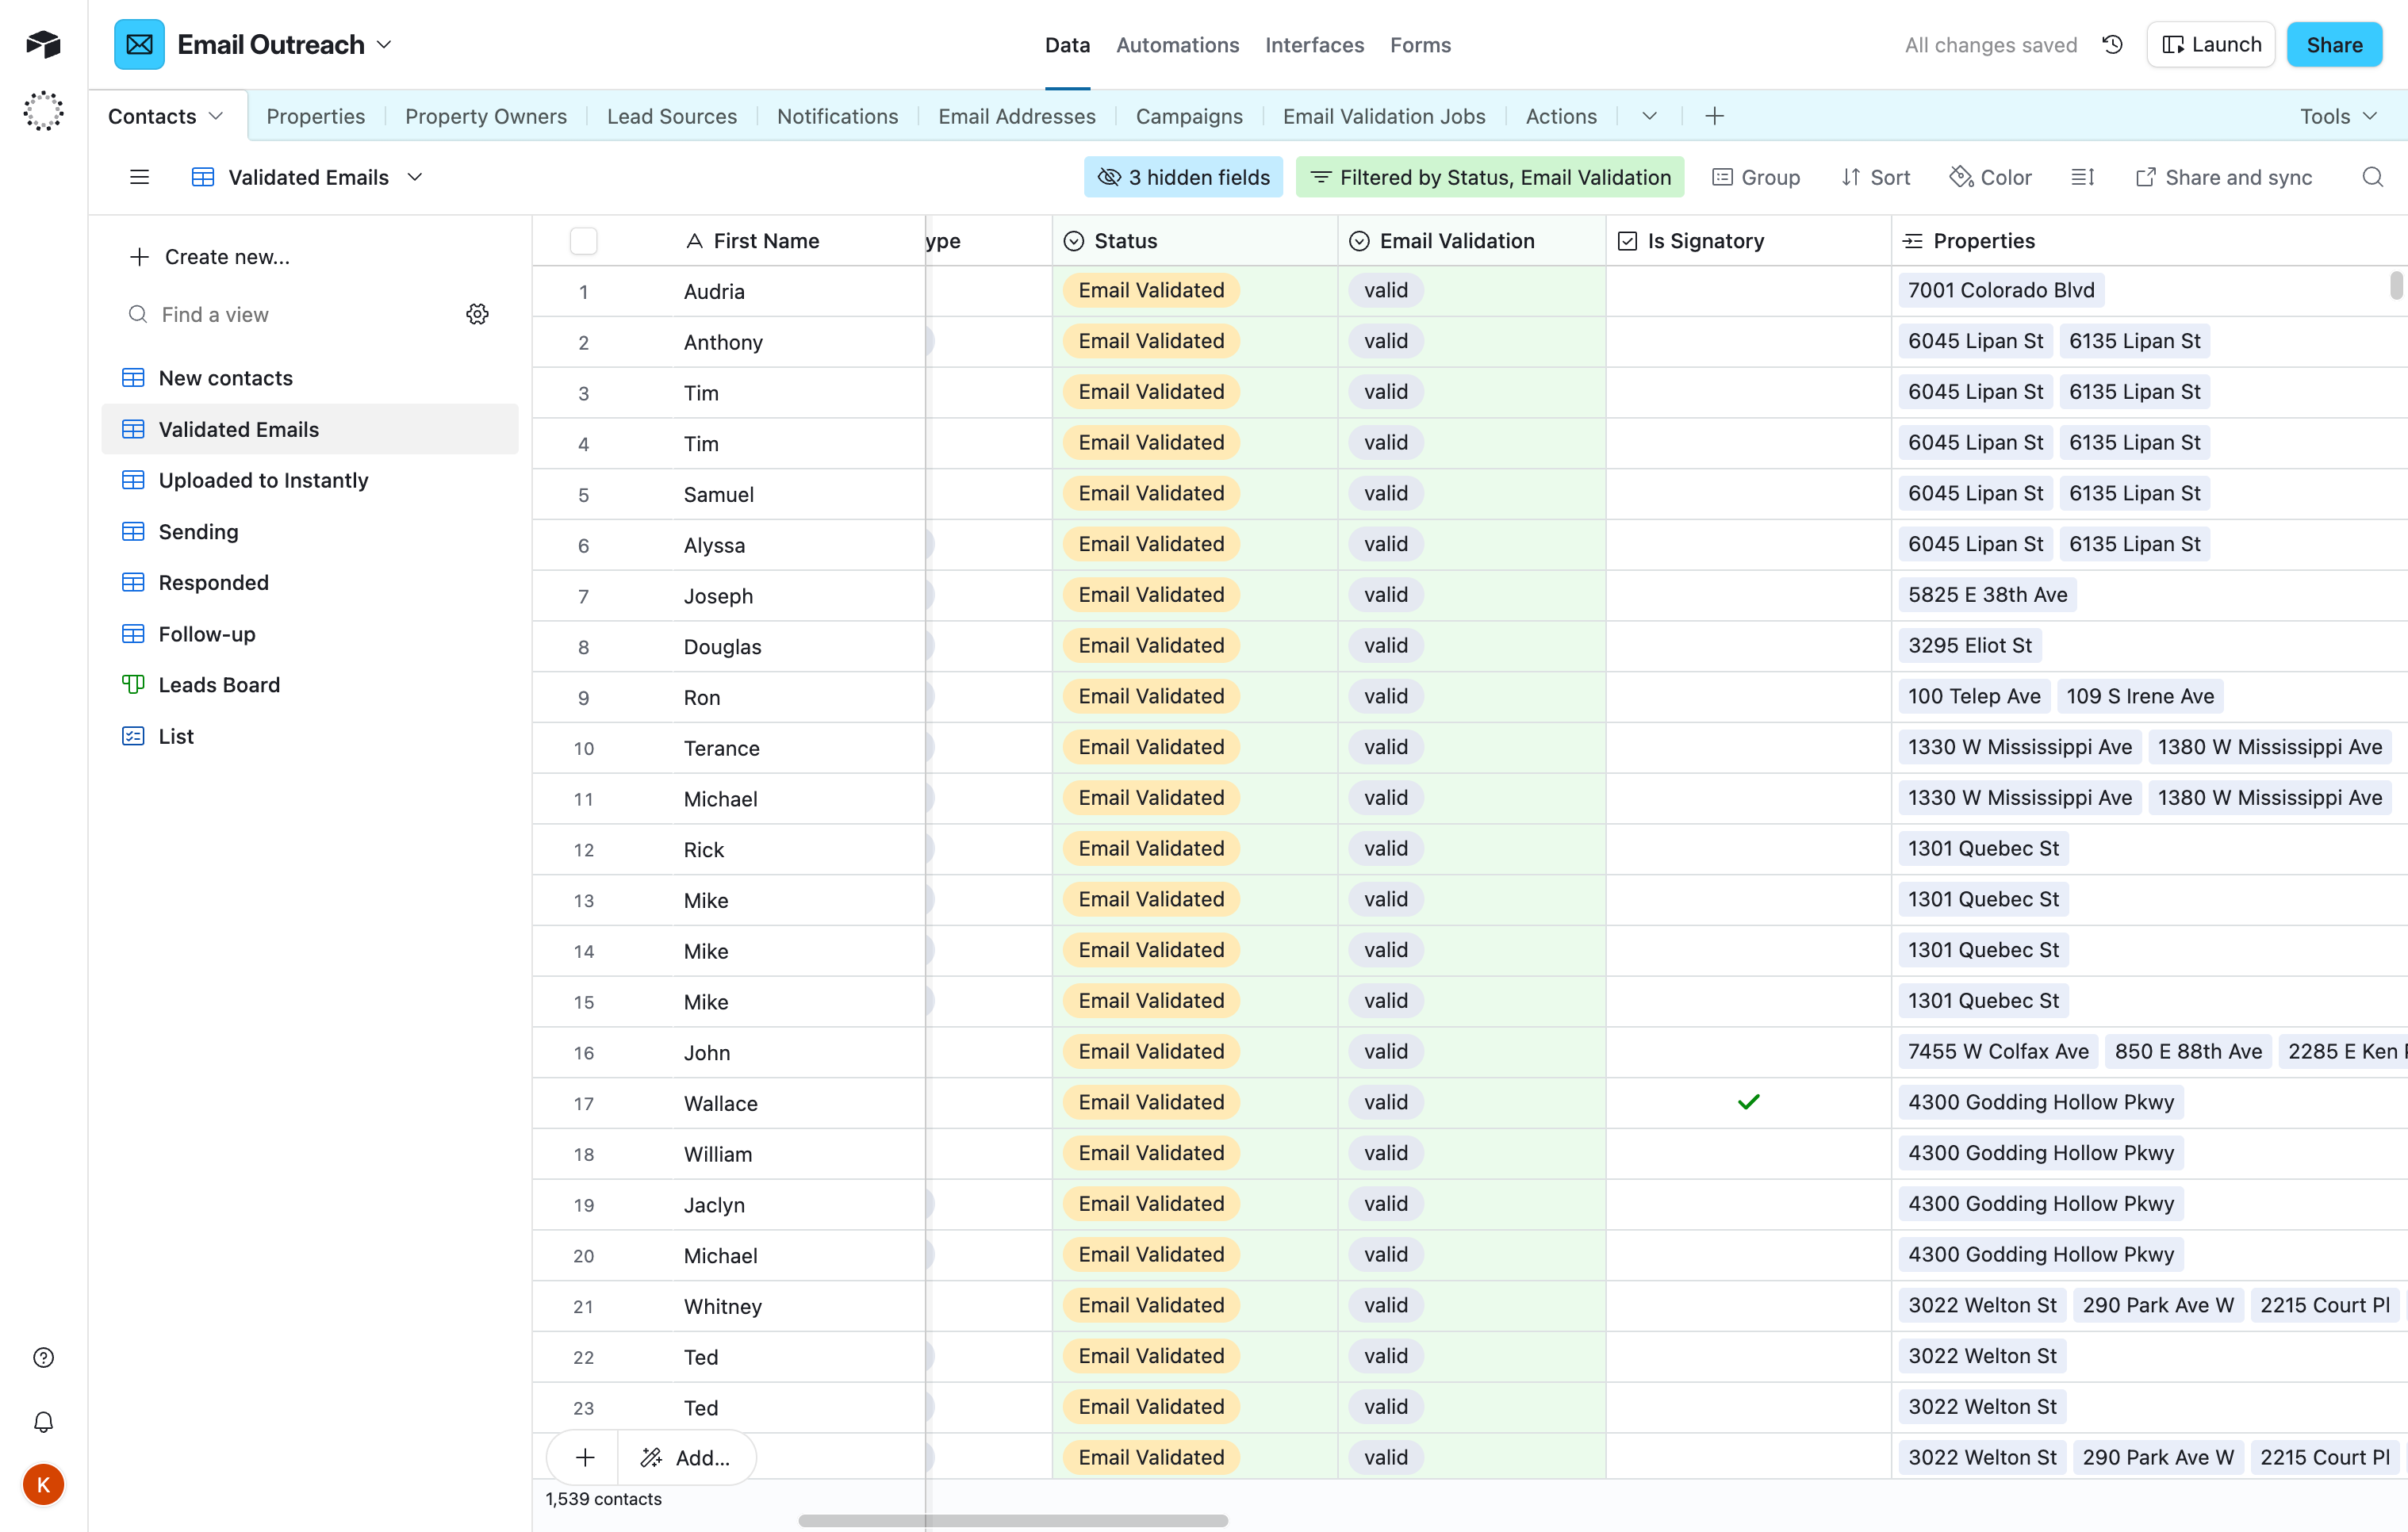 This process is handled automatically. Contact support if you don't see contacts appear
within 24 hours.
Contacts appear in the Validated Emails view with valid email addresses.
* Open Instantly and navigate to your campaign.
* Copy the **campaign ID** from the URL bar.
This process is handled automatically. Contact support if you don't see contacts appear
within 24 hours.
Contacts appear in the Validated Emails view with valid email addresses.
* Open Instantly and navigate to your campaign.
* Copy the **campaign ID** from the URL bar.
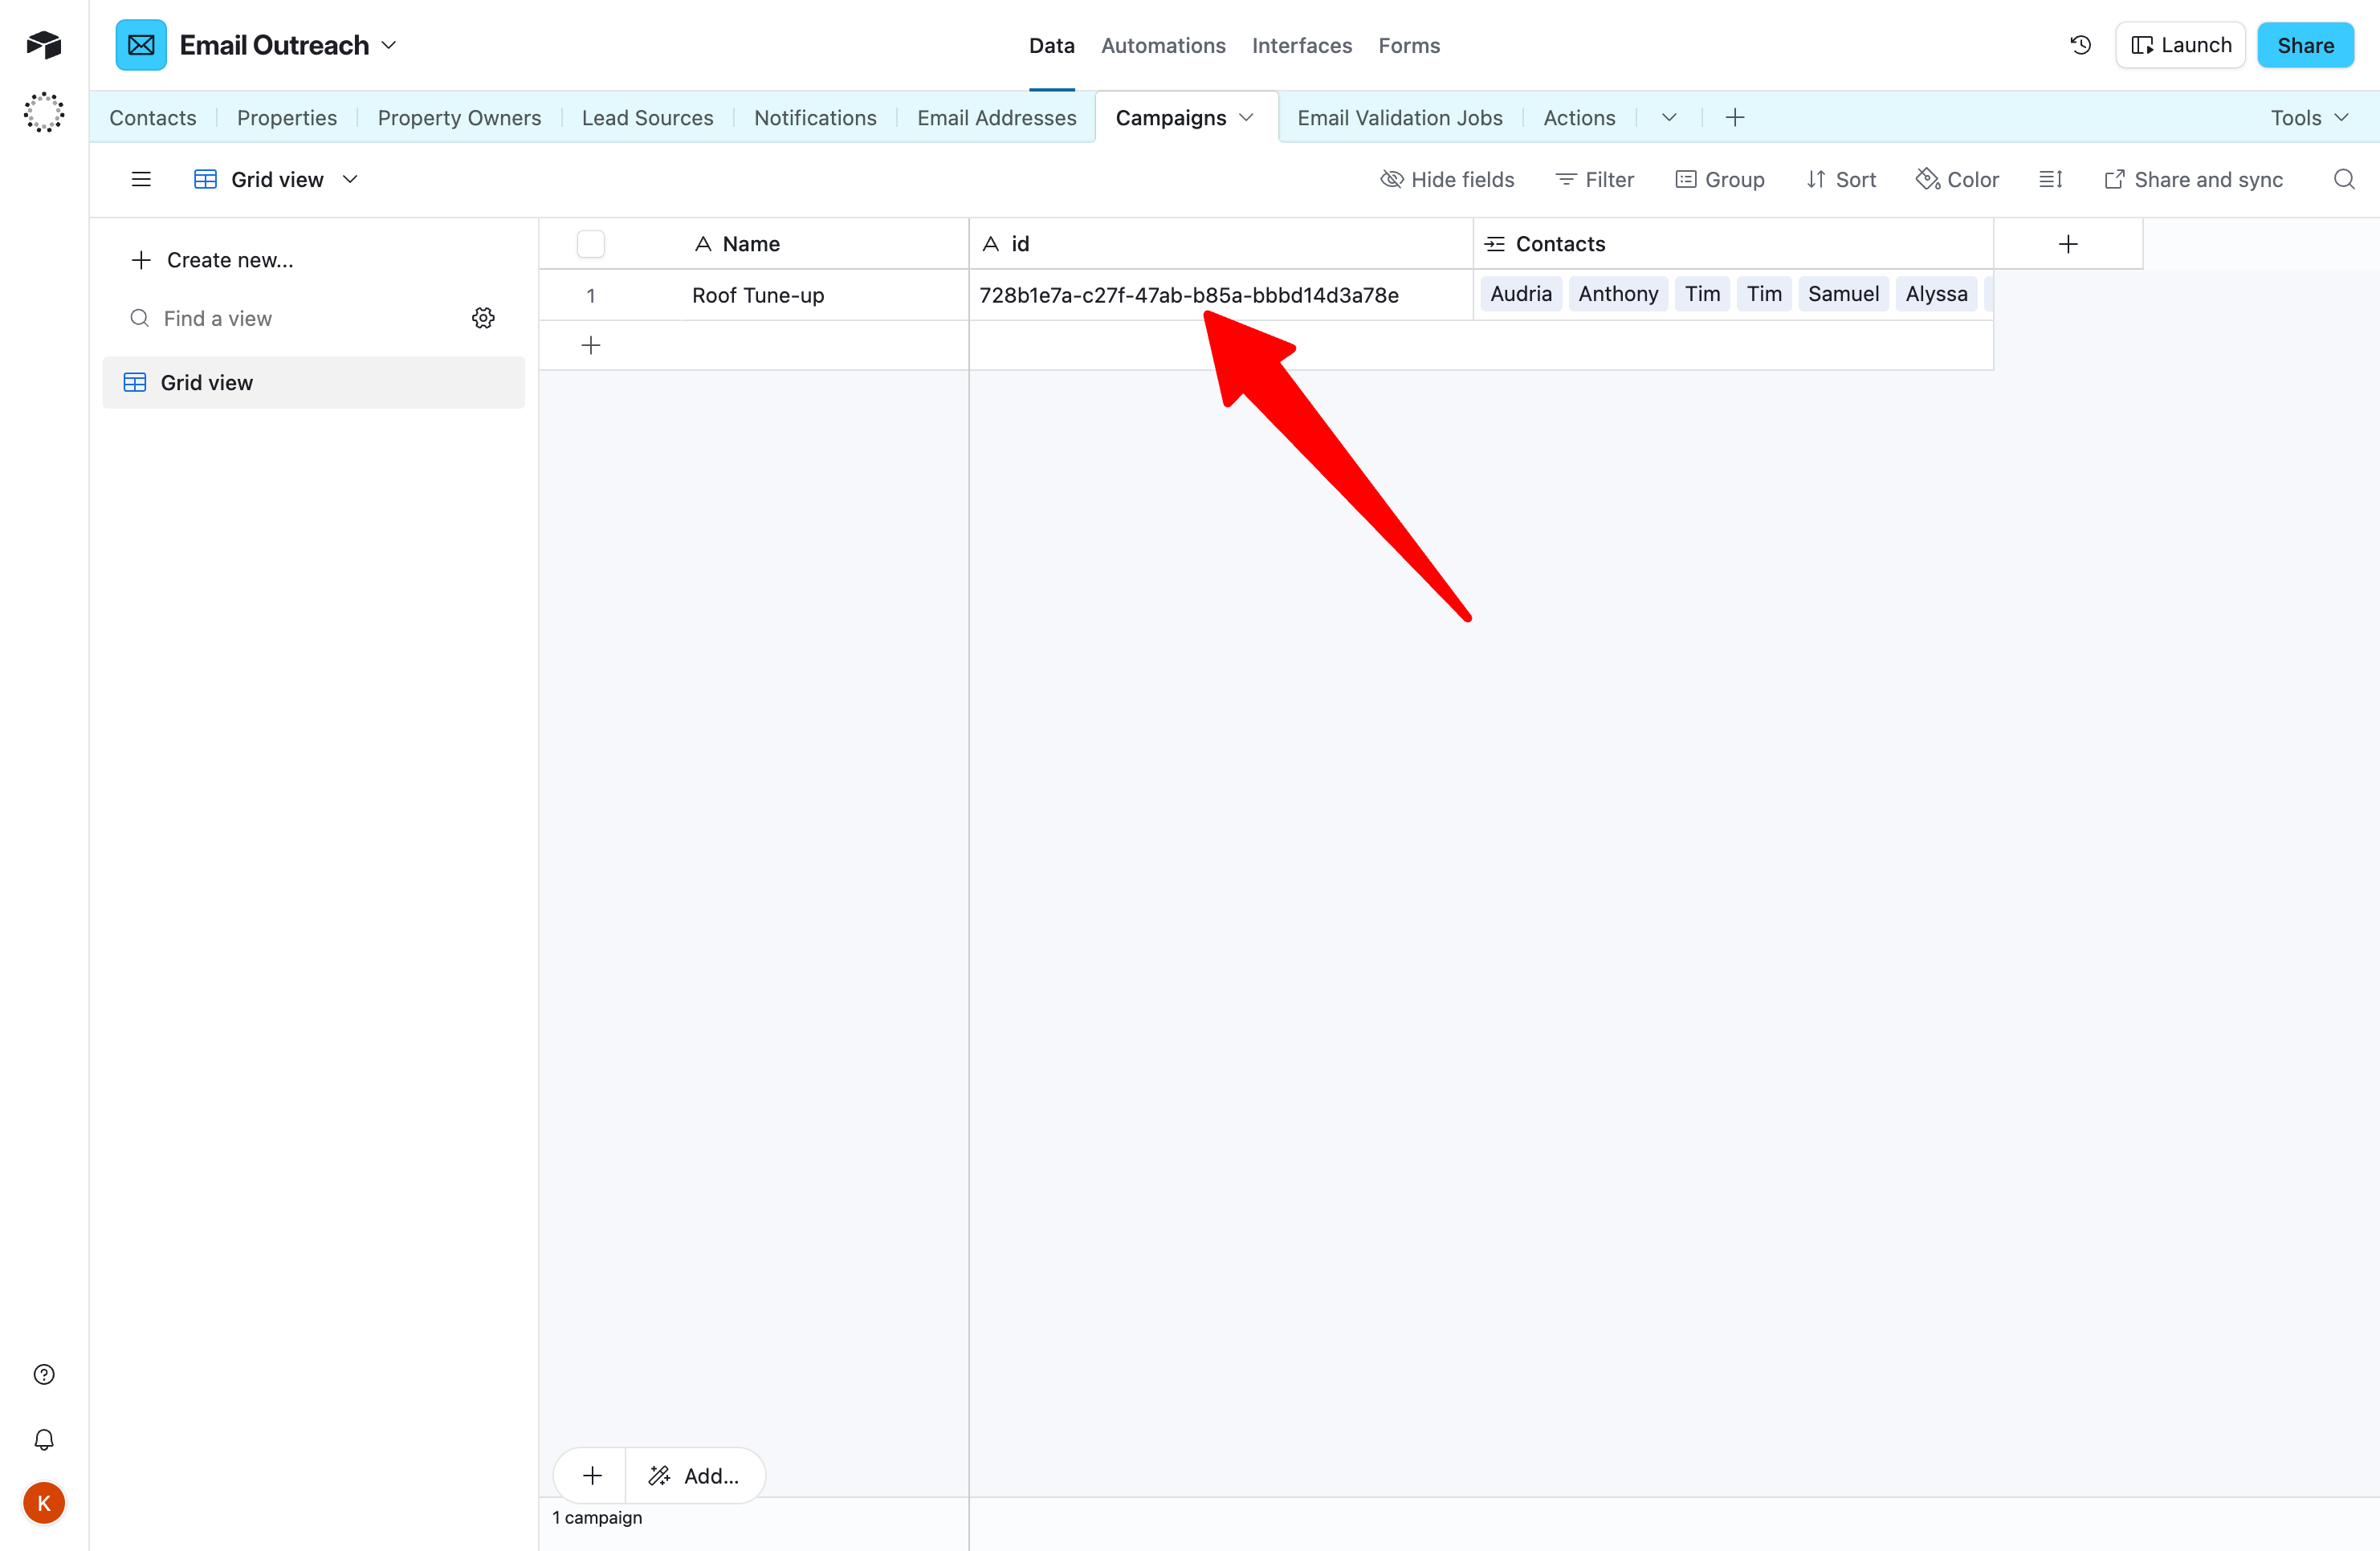
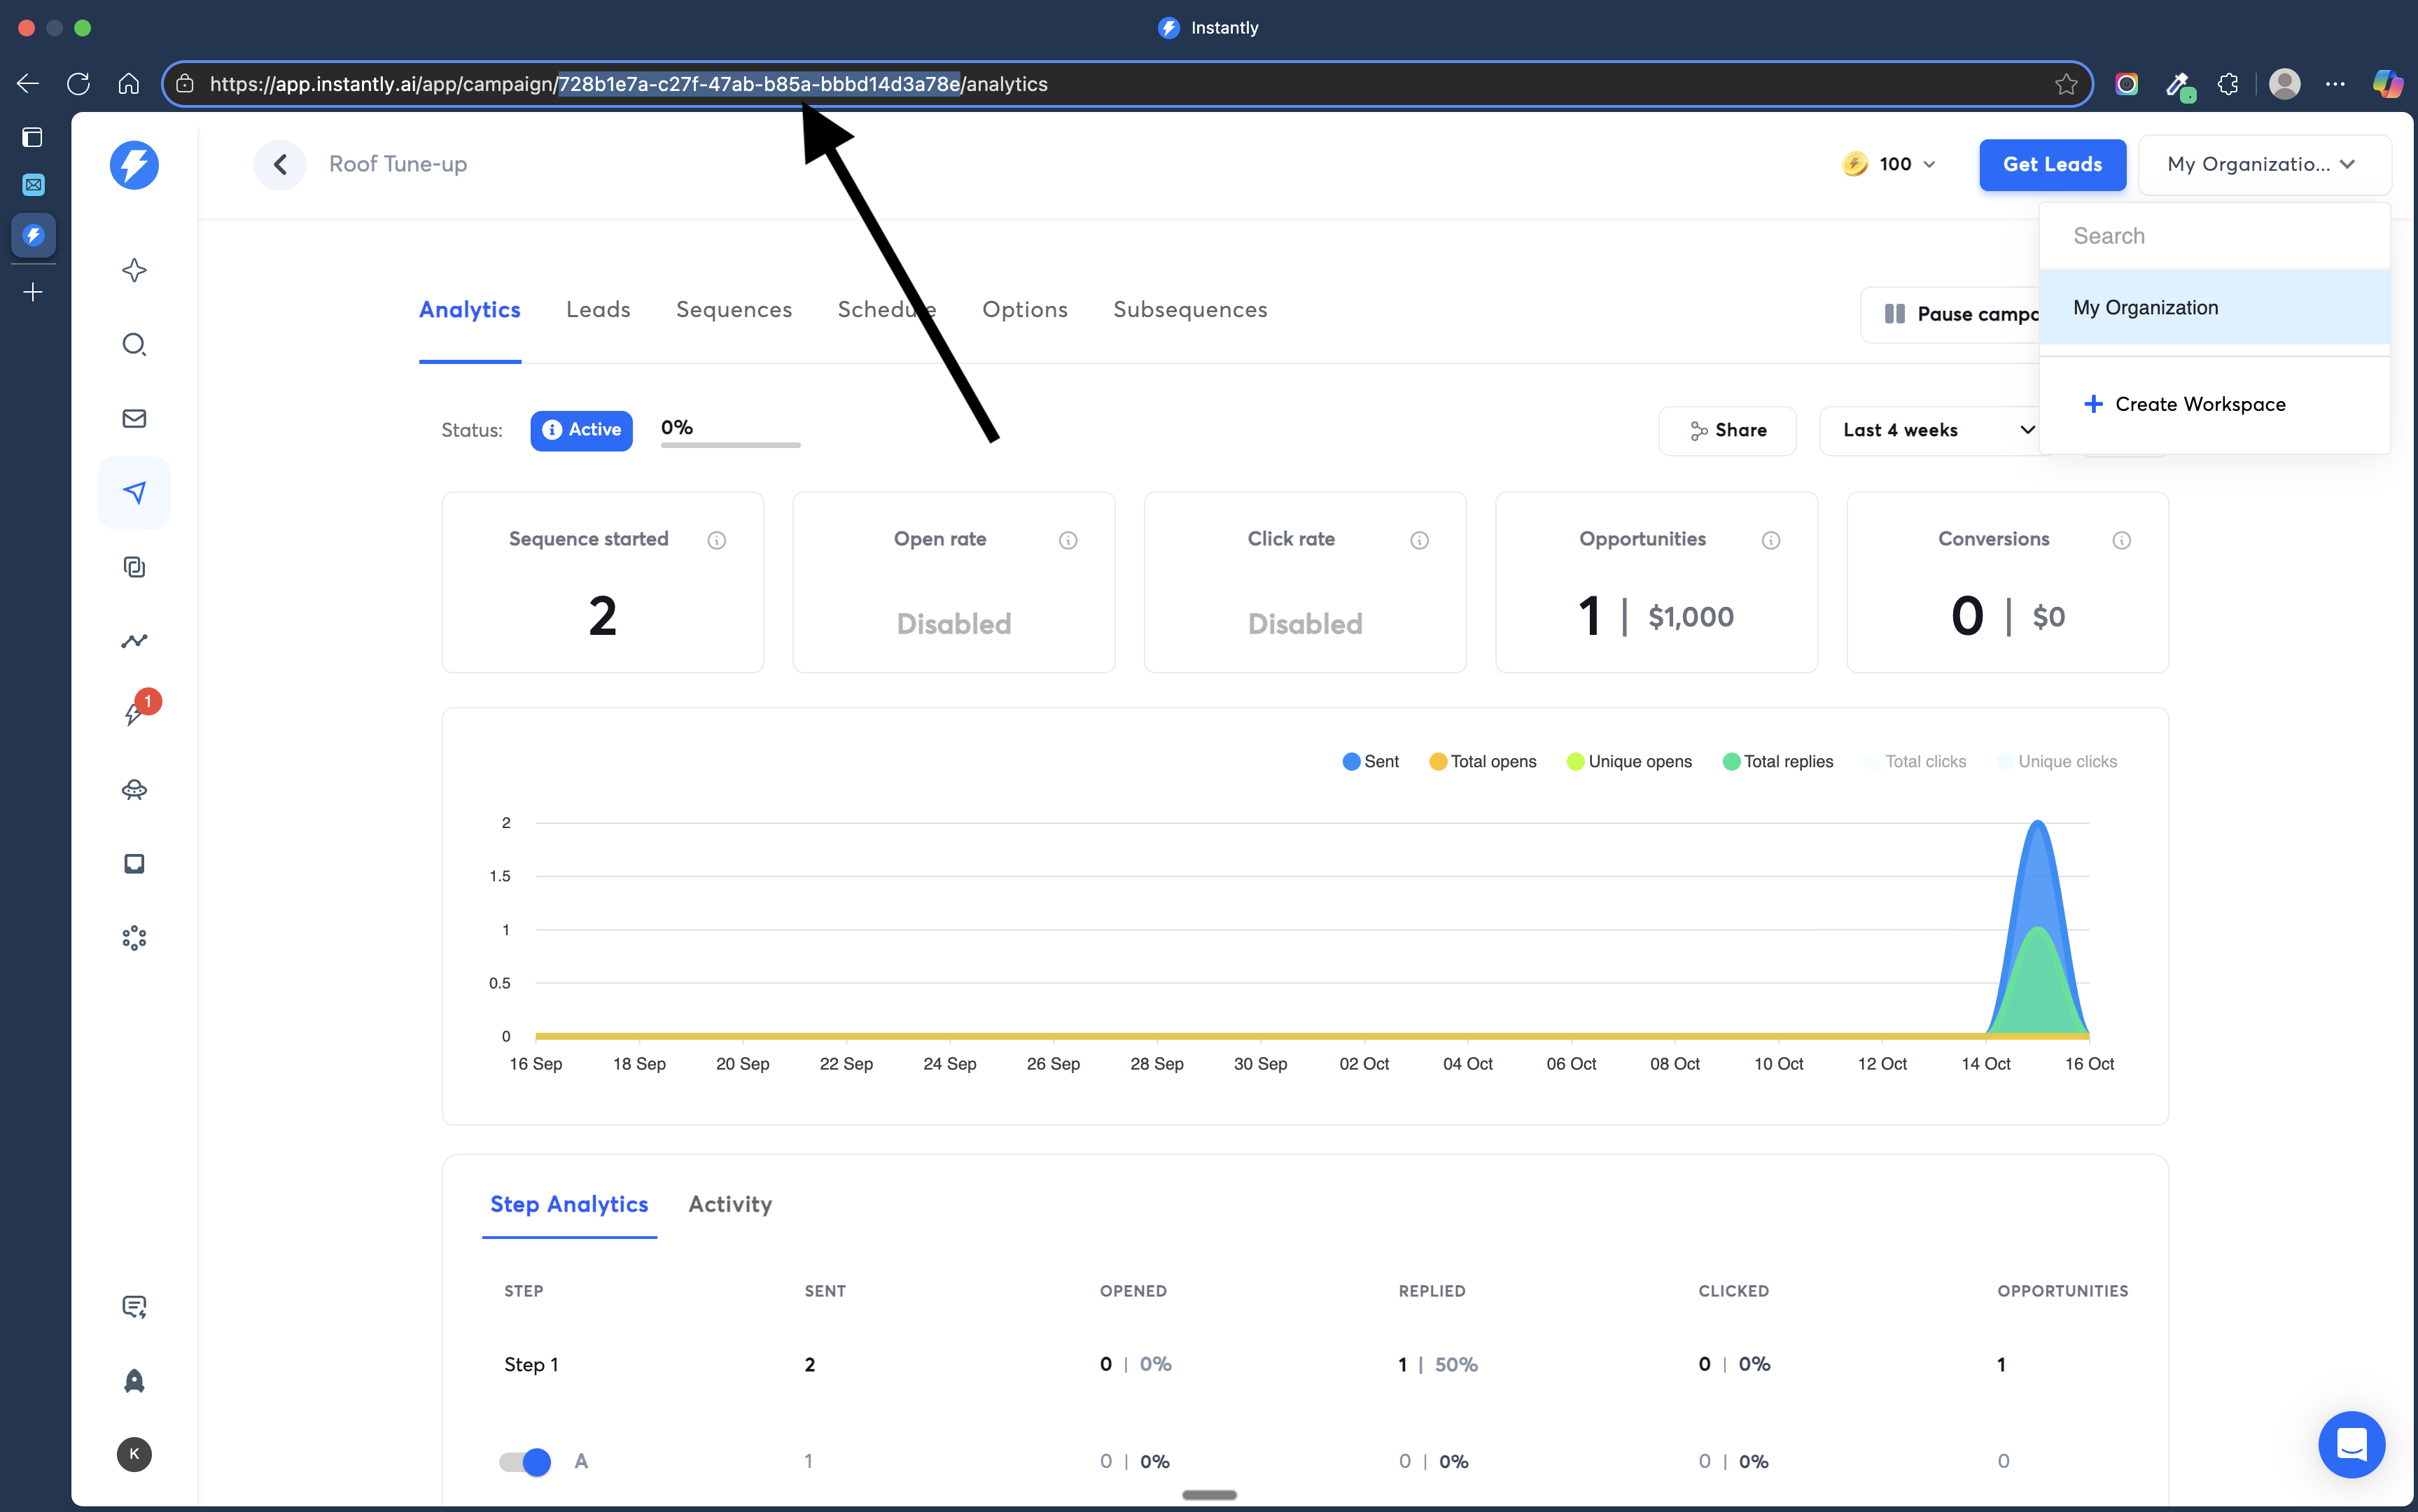 * Navigate to the **Campaigns** table in Airtable.
* Add or update the campaign record with the Instantly campaign ID.
* Navigate to the **Campaigns** table in Airtable.
* Add or update the campaign record with the Instantly campaign ID.
 * Return to the **Contacts** table and switch to the **Validated Emails** view.
* Update the **Campaign** column for contacts to point to your campaign.
* Return to the **Contacts** table and switch to the **Validated Emails** view.
* Update the **Campaign** column for contacts to point to your campaign.
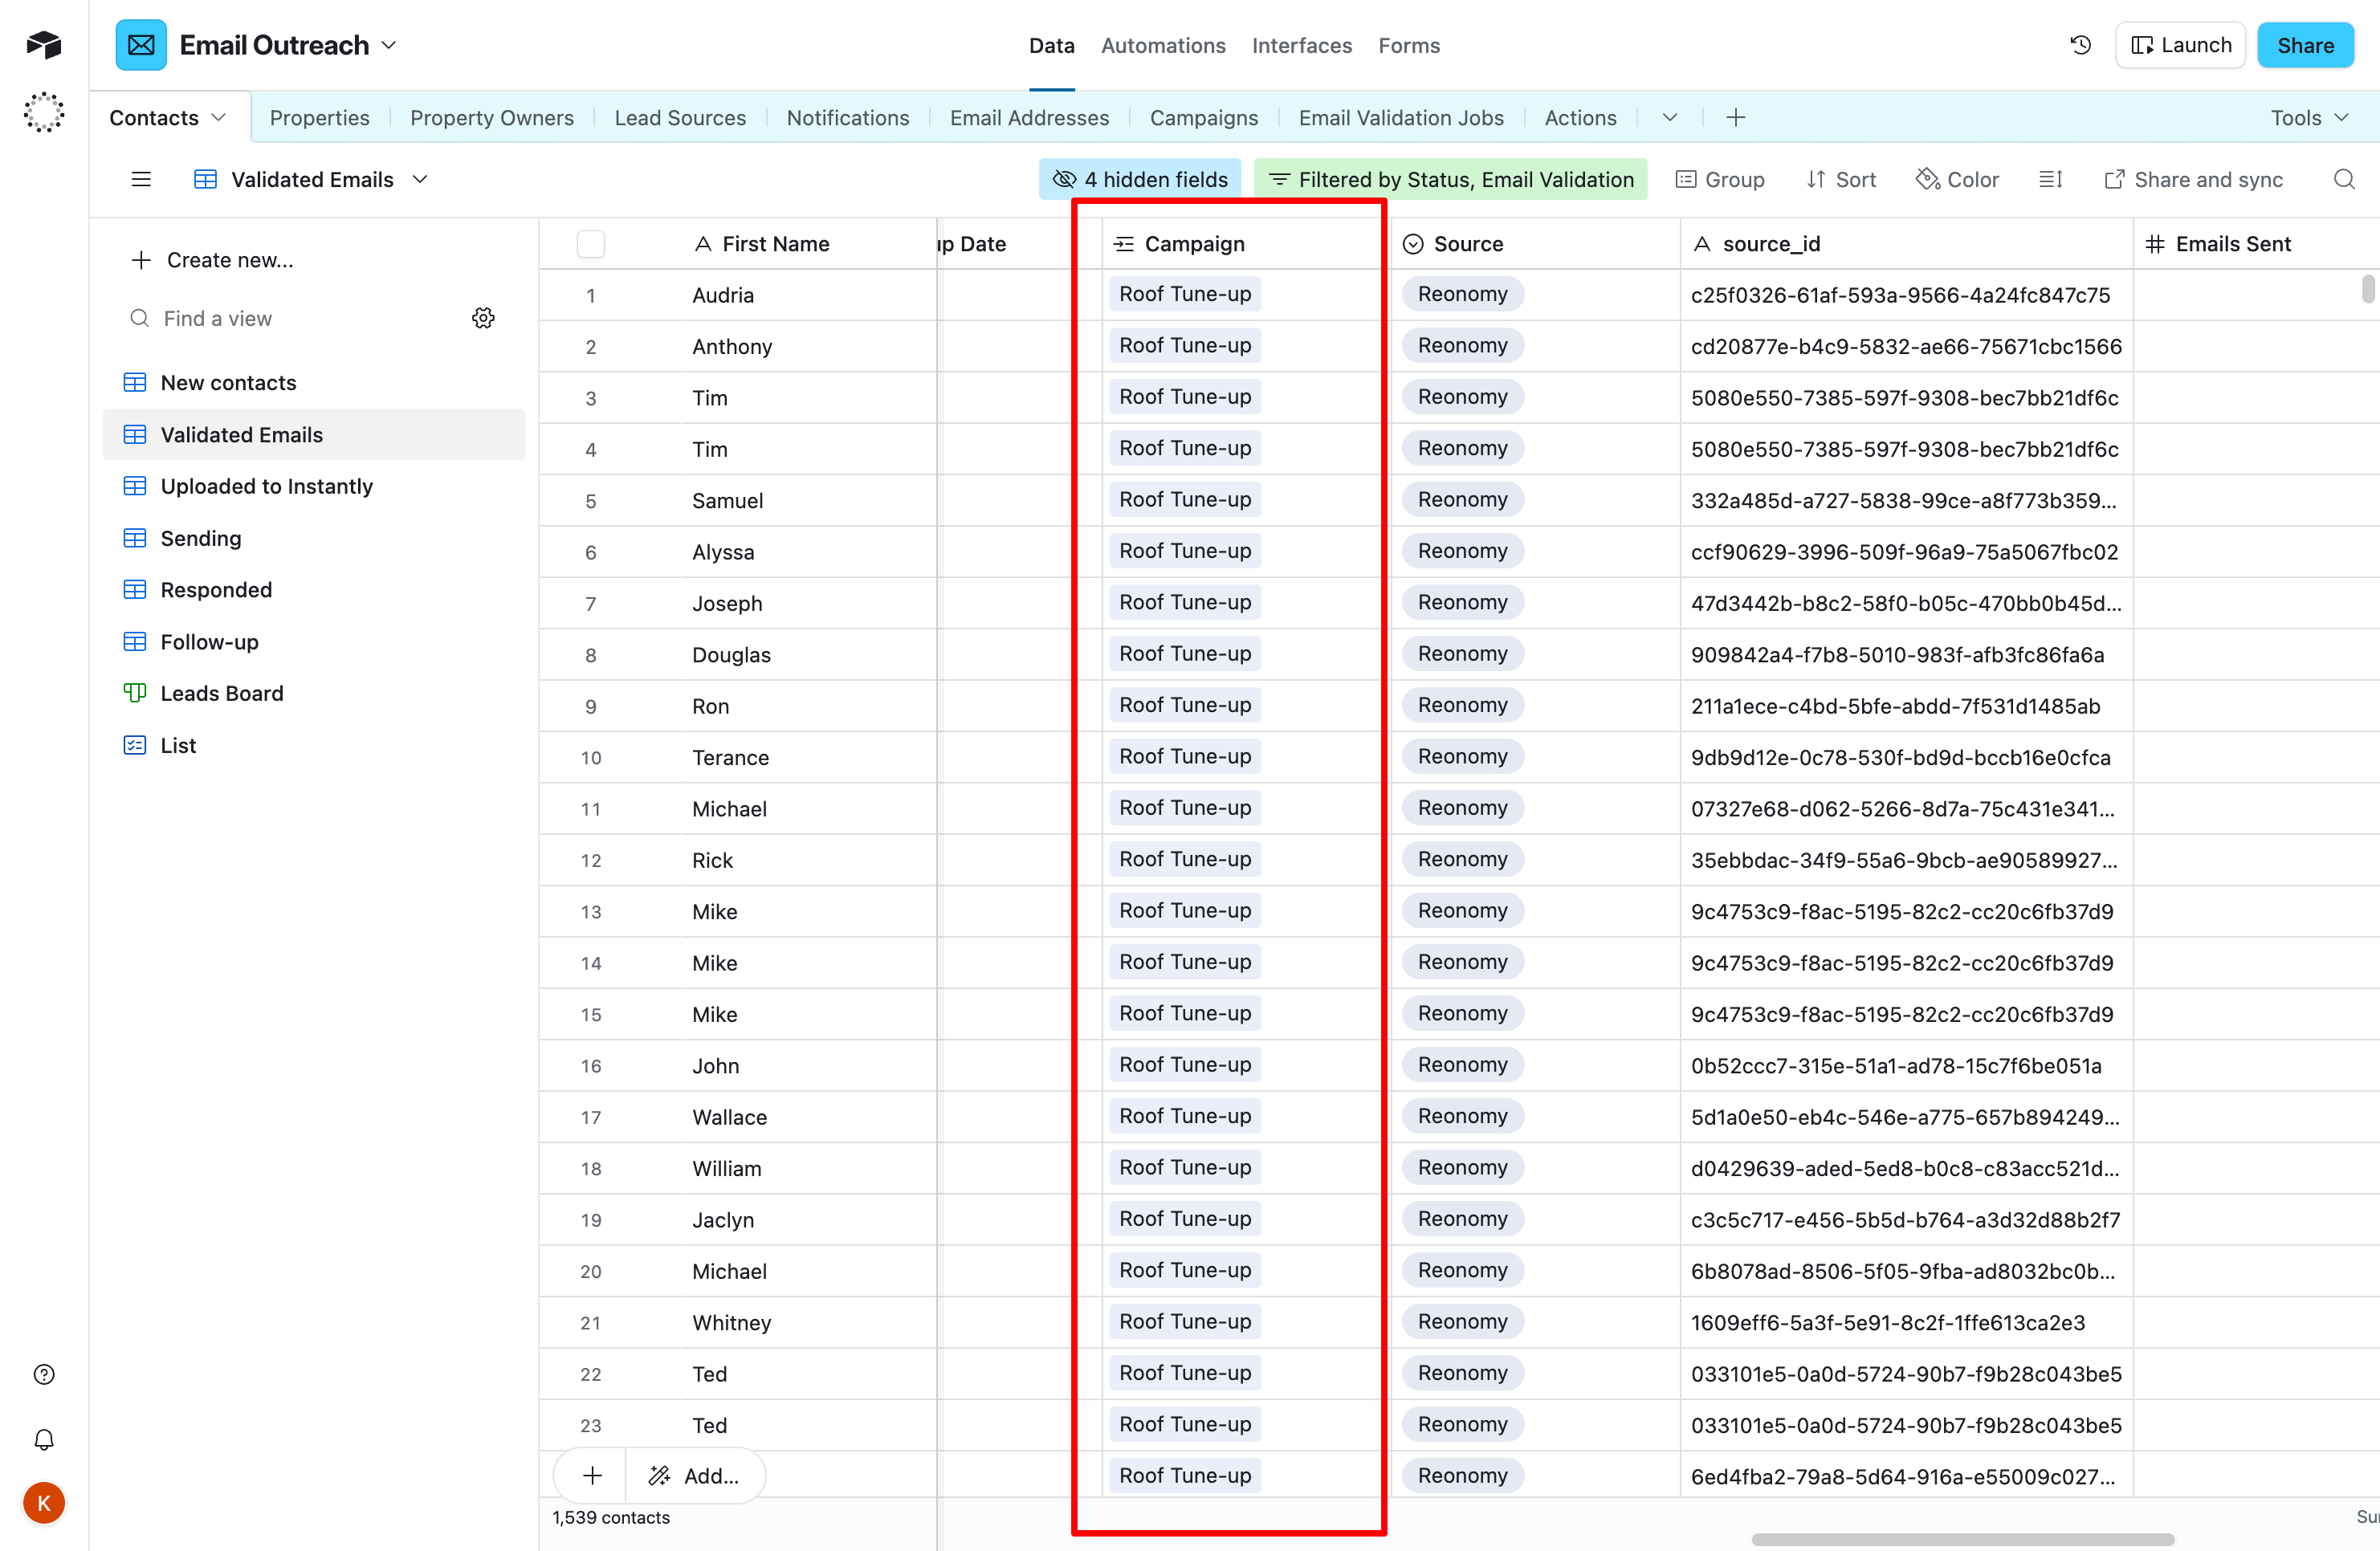 Campaign field is populated for all contacts ready for outreach.
* Navigate to the **Actions** table.
* Click the **Upload contacts to Instantly** action button.
* The system uploads all campaign-assigned contacts to their corresponding Instantly campaigns.
Campaign field is populated for all contacts ready for outreach.
* Navigate to the **Actions** table.
* Click the **Upload contacts to Instantly** action button.
* The system uploads all campaign-assigned contacts to their corresponding Instantly campaigns.
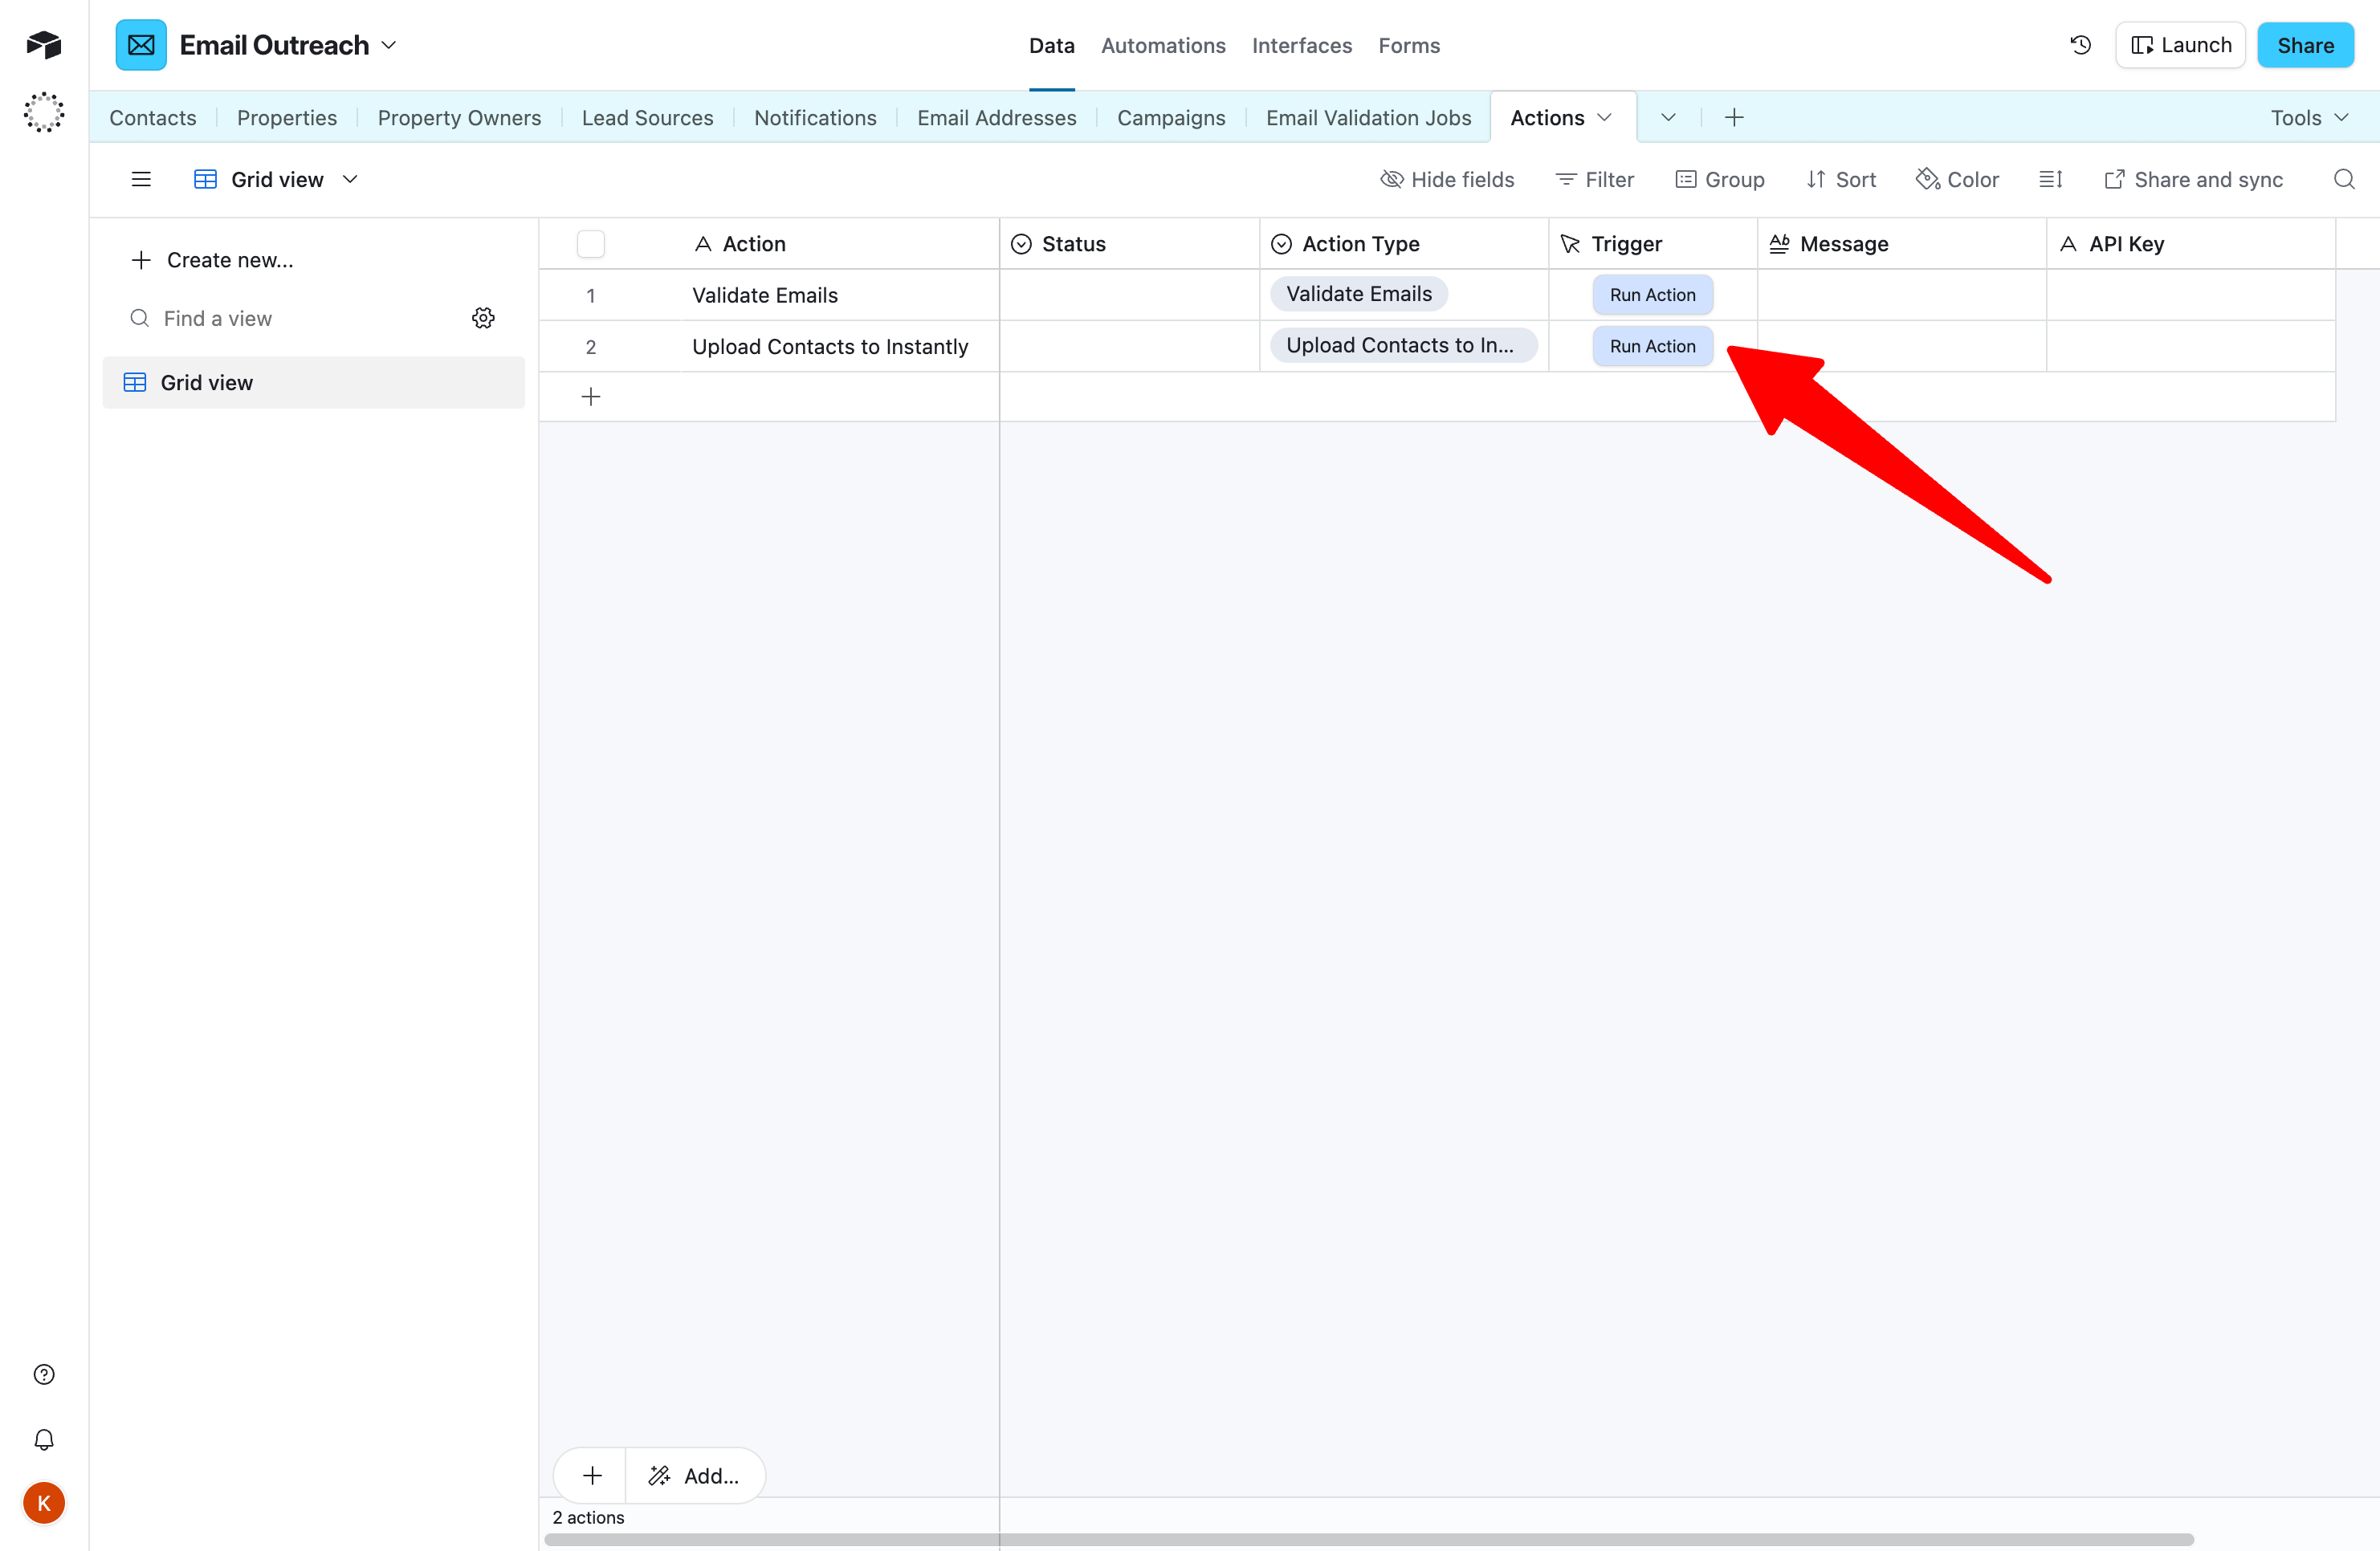 Contacts appear in your Instantly campaign ready to send.
## Troubleshooting
Contacts appear in your Instantly campaign ready to send.
## Troubleshooting